Tengence Data Center User Guide: API Push, MySQL, and Behavior Datasets
This guide explains how to connect your business data to the Tengence Data Center: how to open the Data Center, create the three dataset types (API Push / MySQL / Behavior), and view and manage the datasets you have created.
1. Data Center Overview
The Data Center supports three data ingestion methods. Choose the dataset type that fits the source and shape of your data:
| Dataset Type | Best For | Ingestion Method |
|---|---|---|
| API Push dataset | Business data is complex and needs processing and formatting first | Assemble the data, then push it to the dataset via API |
| MySQL dataset | Data is stored in a single MySQL table | Automatically synced from the MySQL data source |
| Behavior dataset | You need to collect user behavior data on your pages | Automatically reported after the behavior data SDK is integrated on the frontend |
2. Opening the Data Center
-
Log in to the Tengence console and find "Data Center" in the left navigation, then click to enter.
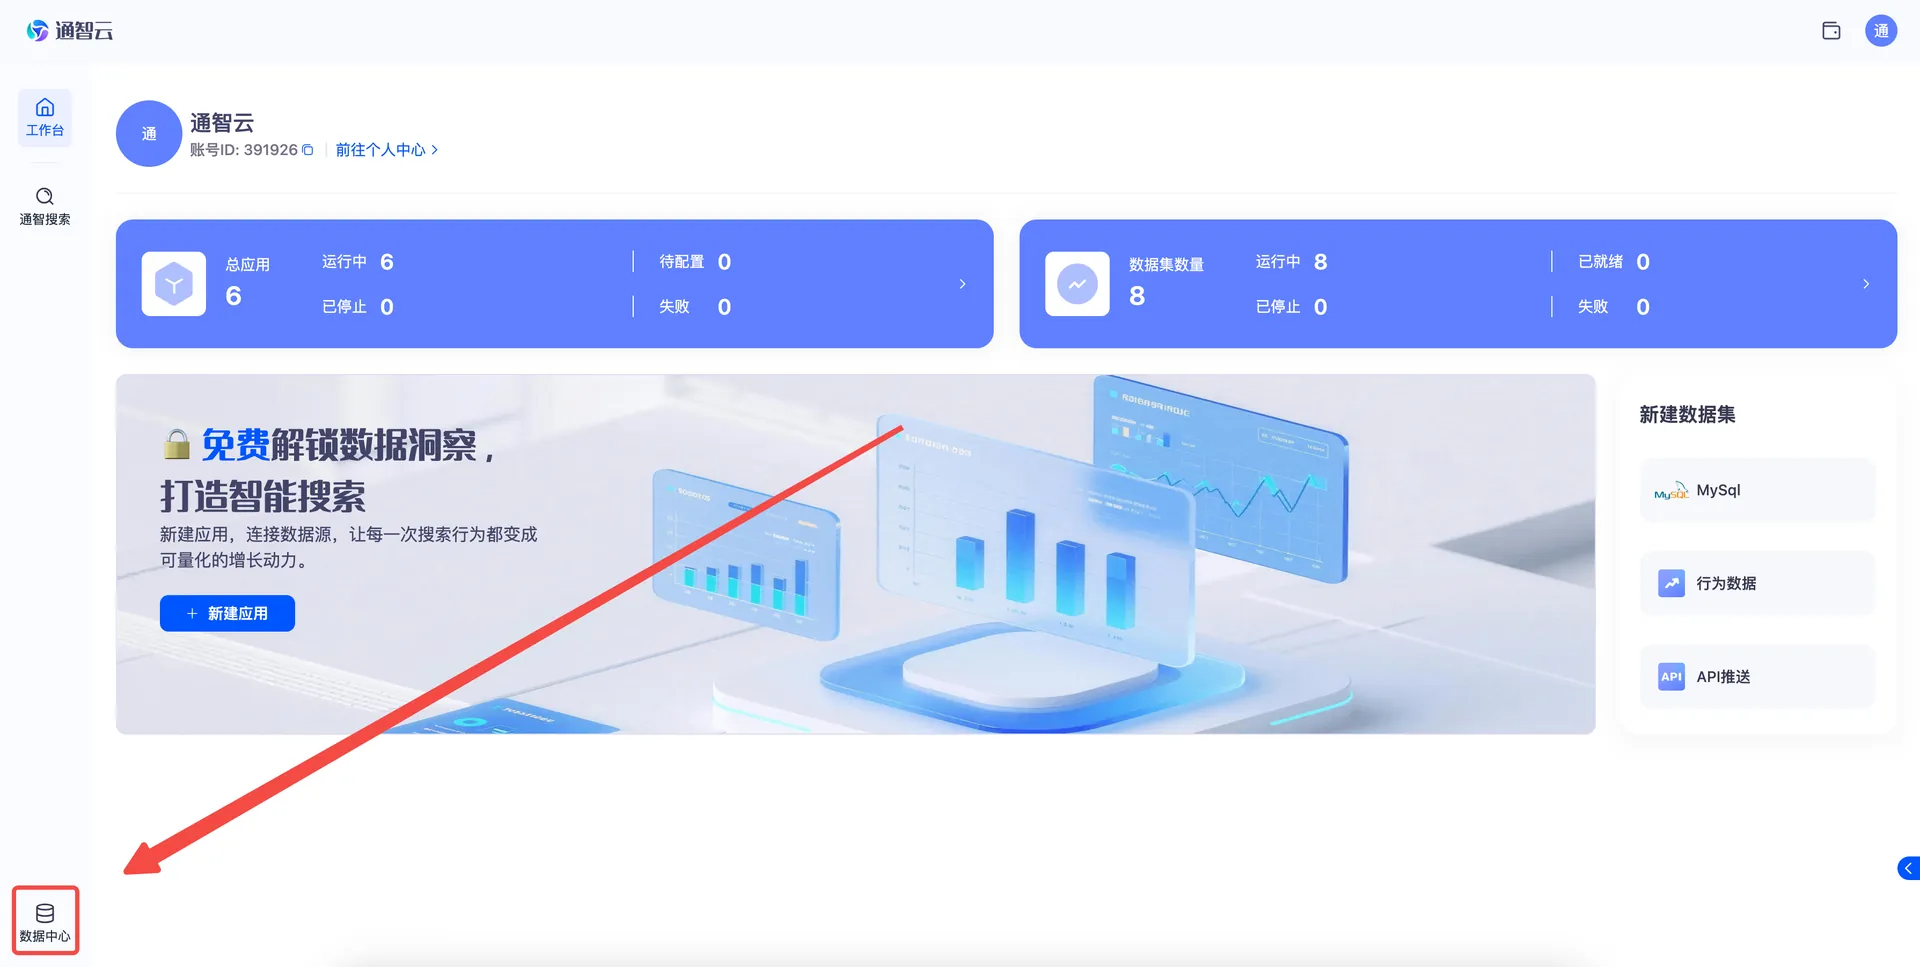
Figure 2-1 The "Data Center" entry in the left navigation -
You arrive at the Data Center overview page. The "Quick Create" area of the overview page provides entry points for creating the three dataset types.
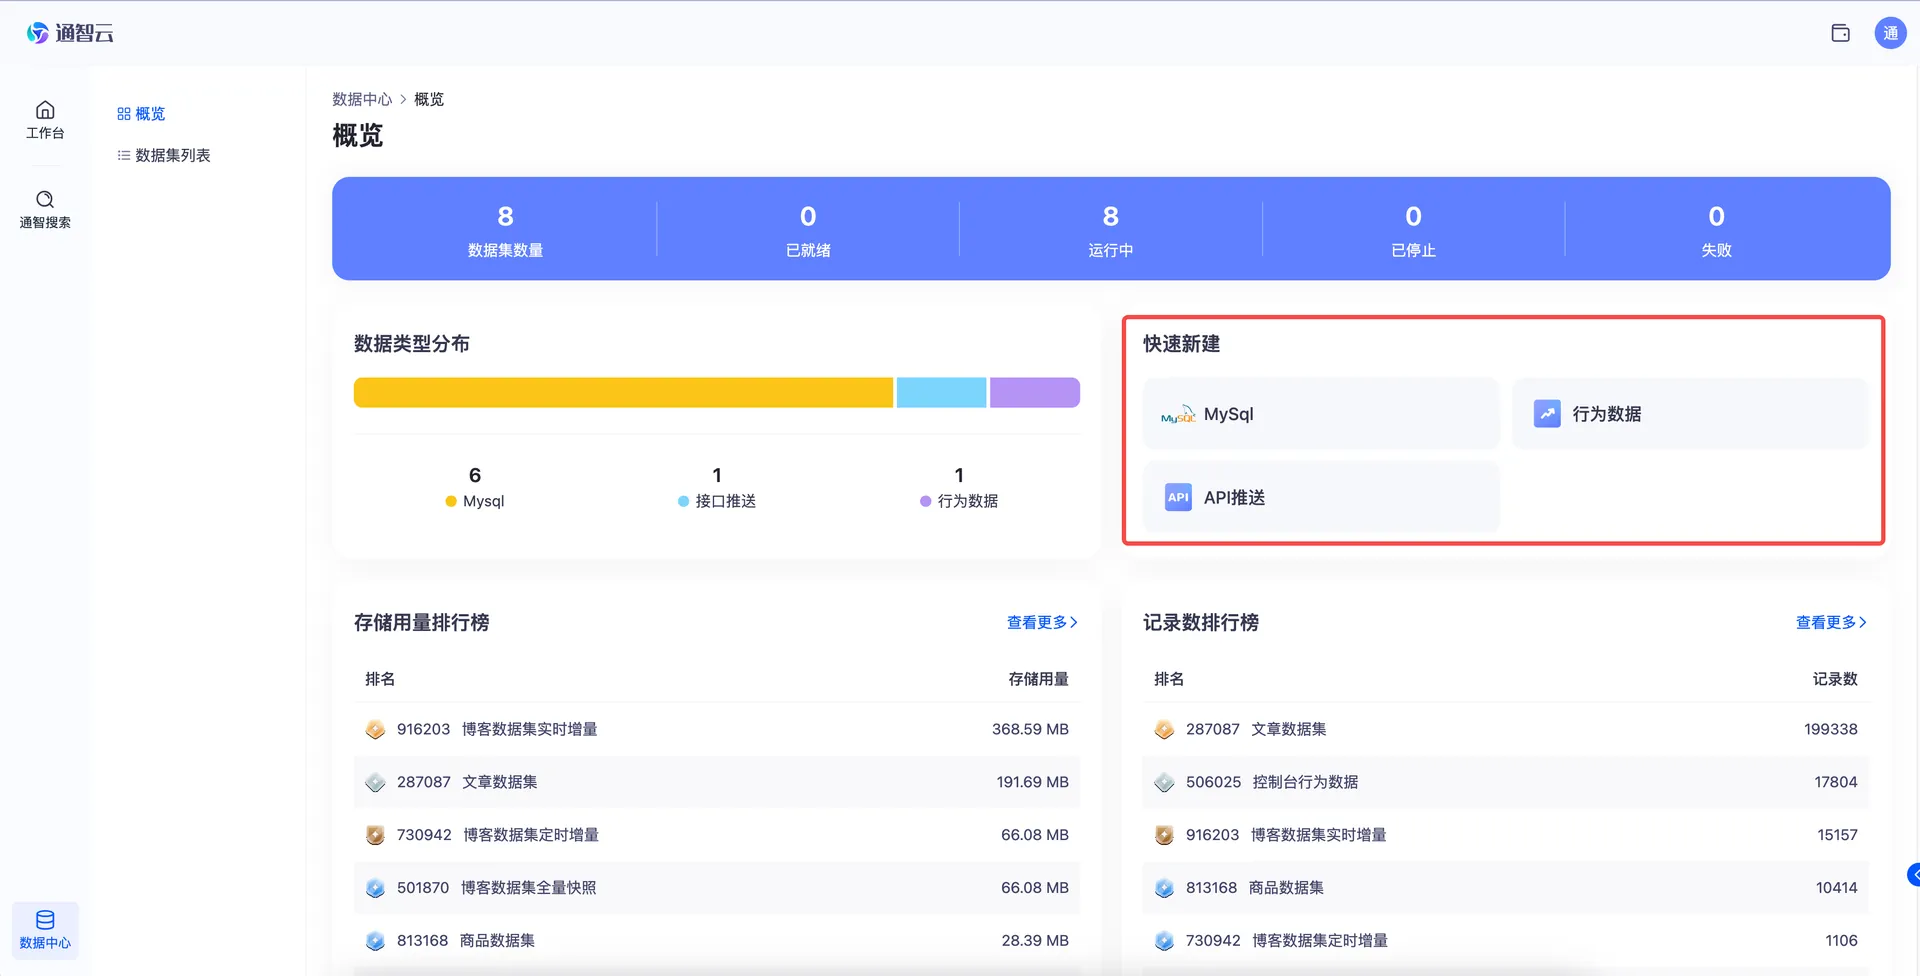
Figure 2-2 Data Center overview page with the "Quick Create" area
3. Creating an API Push Dataset
When to use: your business data is complex and needs some processing and formatting first. We recommend assembling the data and then pushing it to the dataset via API.
💡 Tip: In most cases, prefer the API Push method.
Step 1: Create the dataset
-
On the overview page, click "API Push" in the "Quick Create" area to open the dataset creation page.
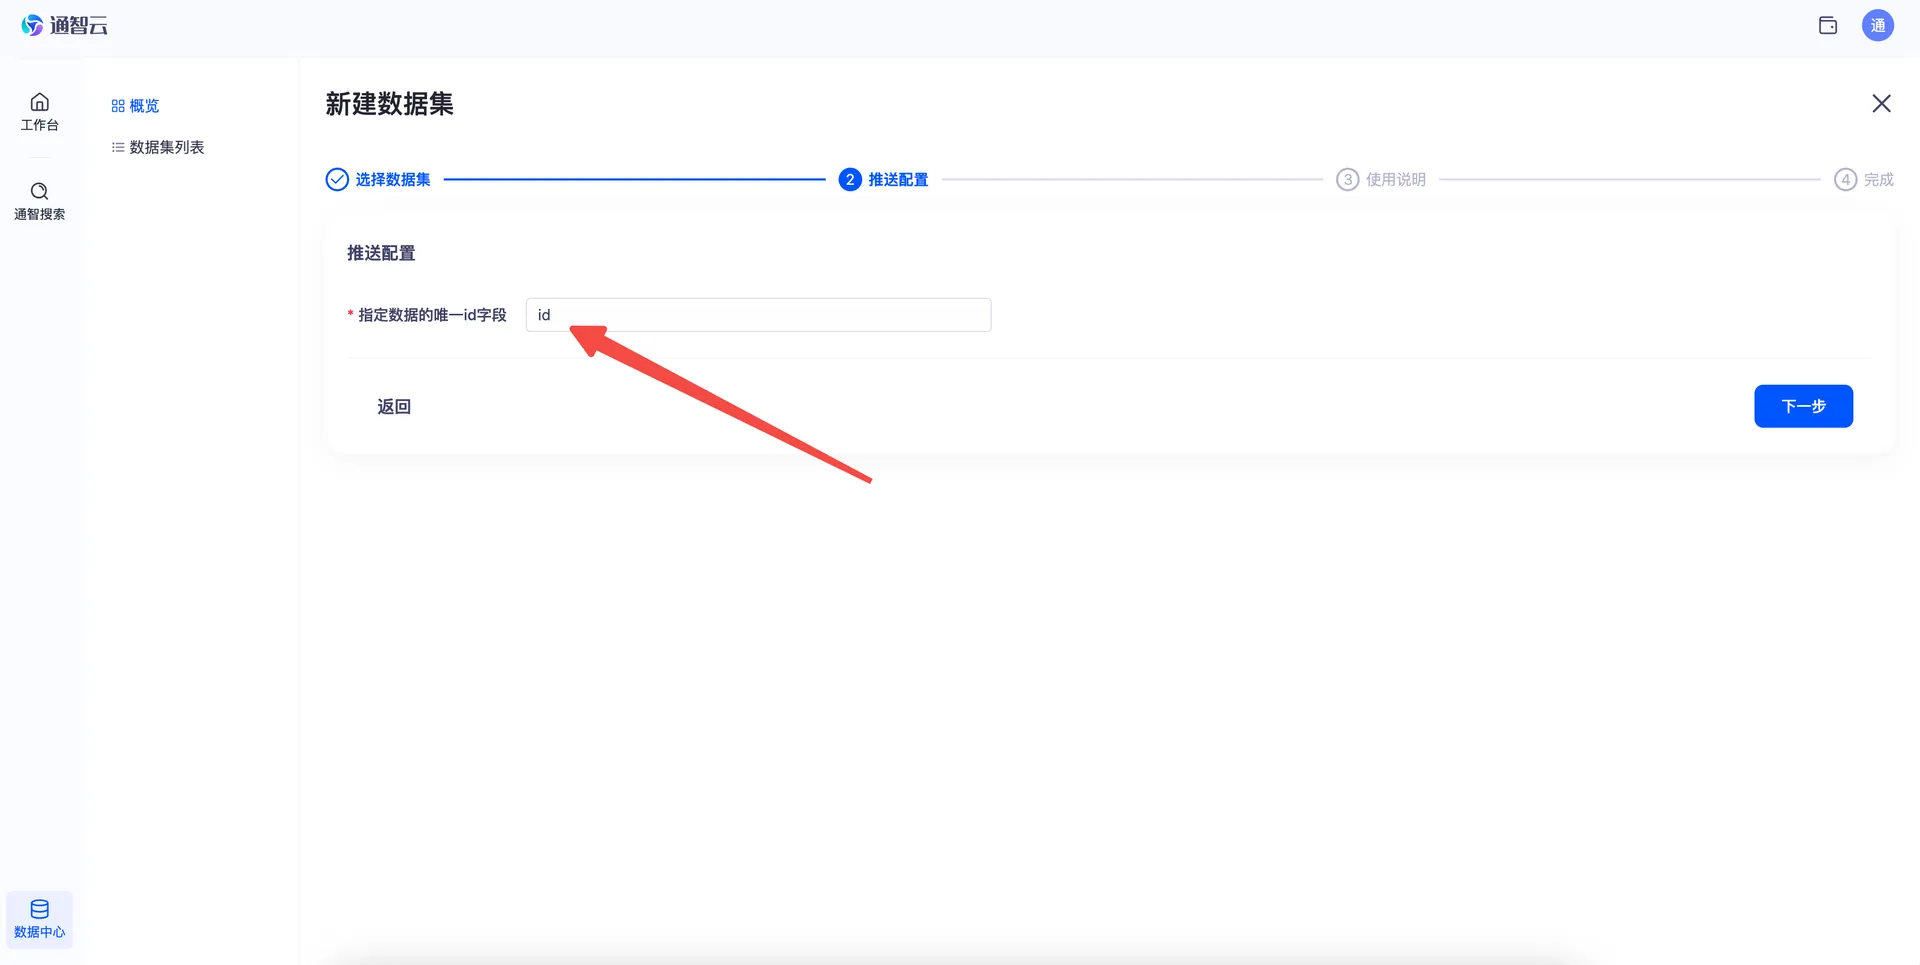
Figure 3-1 Click "API Push" in the "Quick Create" area -
Set the name of the ID field. Every dataset must have an ID field; the default name is "id", and you can change it to fit your business.
-
Click "Next", read the data push instructions, then click "Create" to finish creating the dataset.
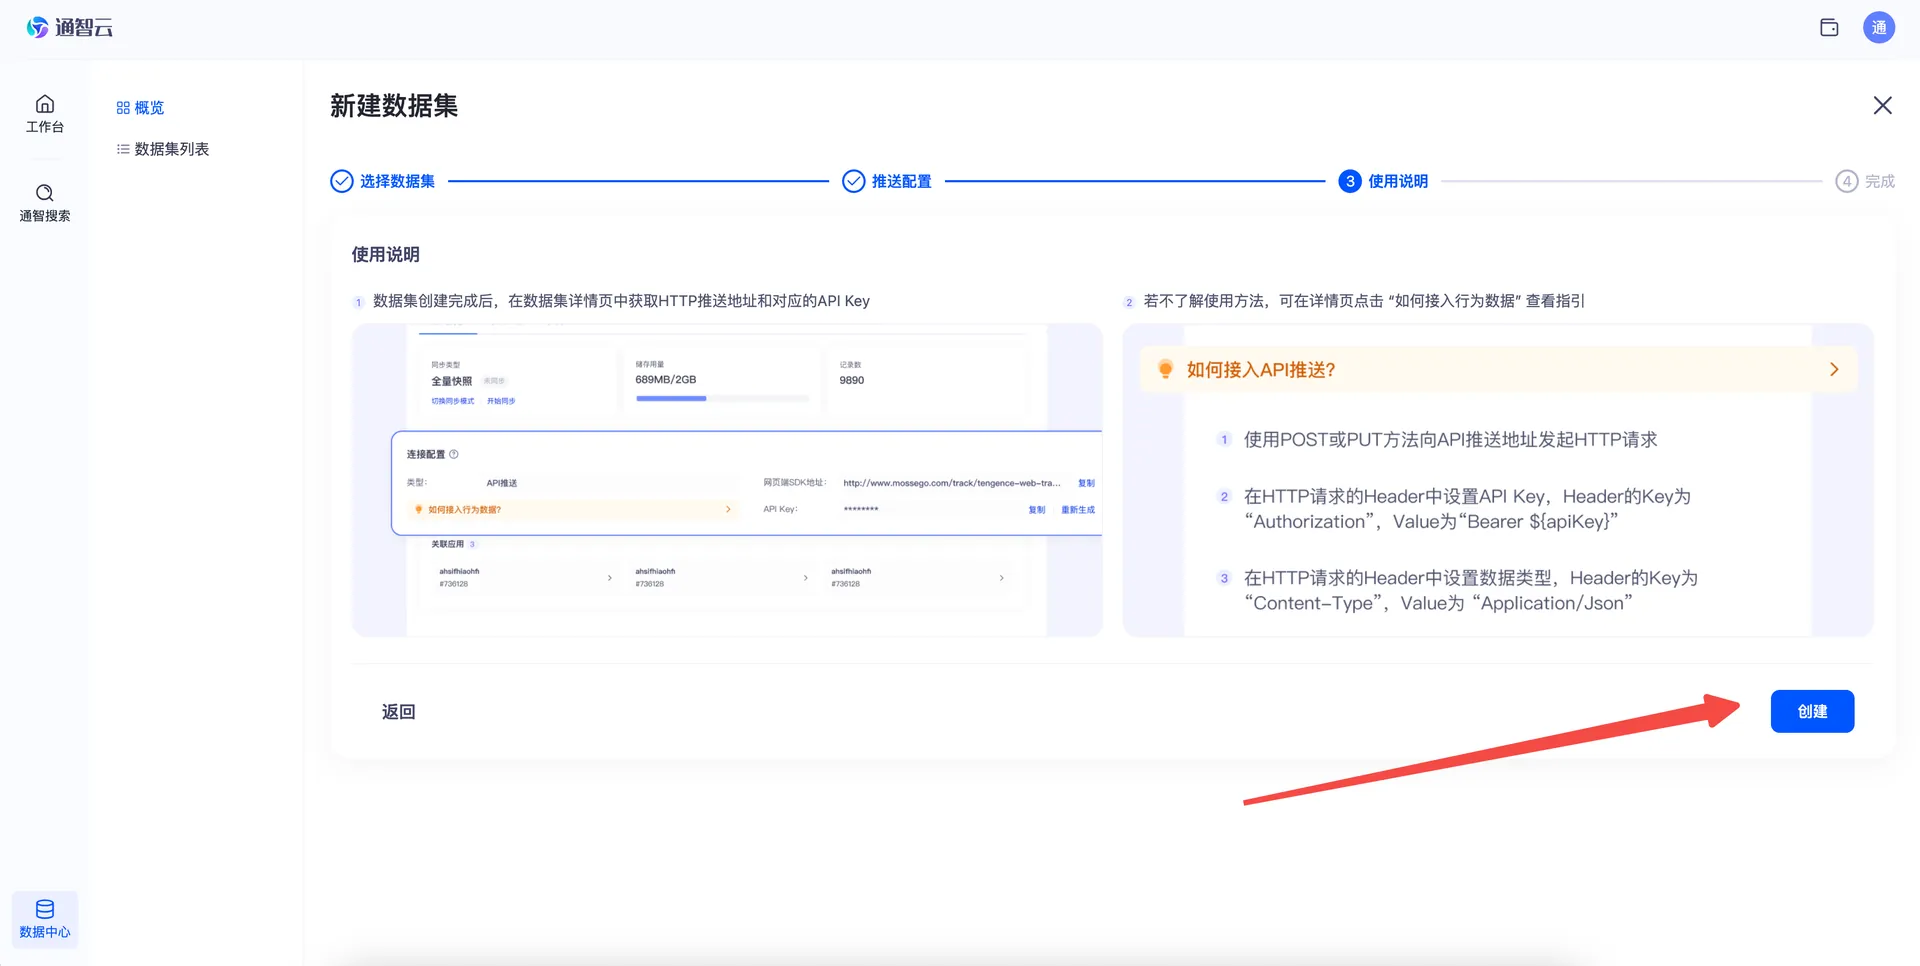
Figure 3-2 Read the data push instructions and finish creation
Step 2: Open the dataset detail page
-
The overview page provides a "Dataset List" entry. Click it to view all datasets.
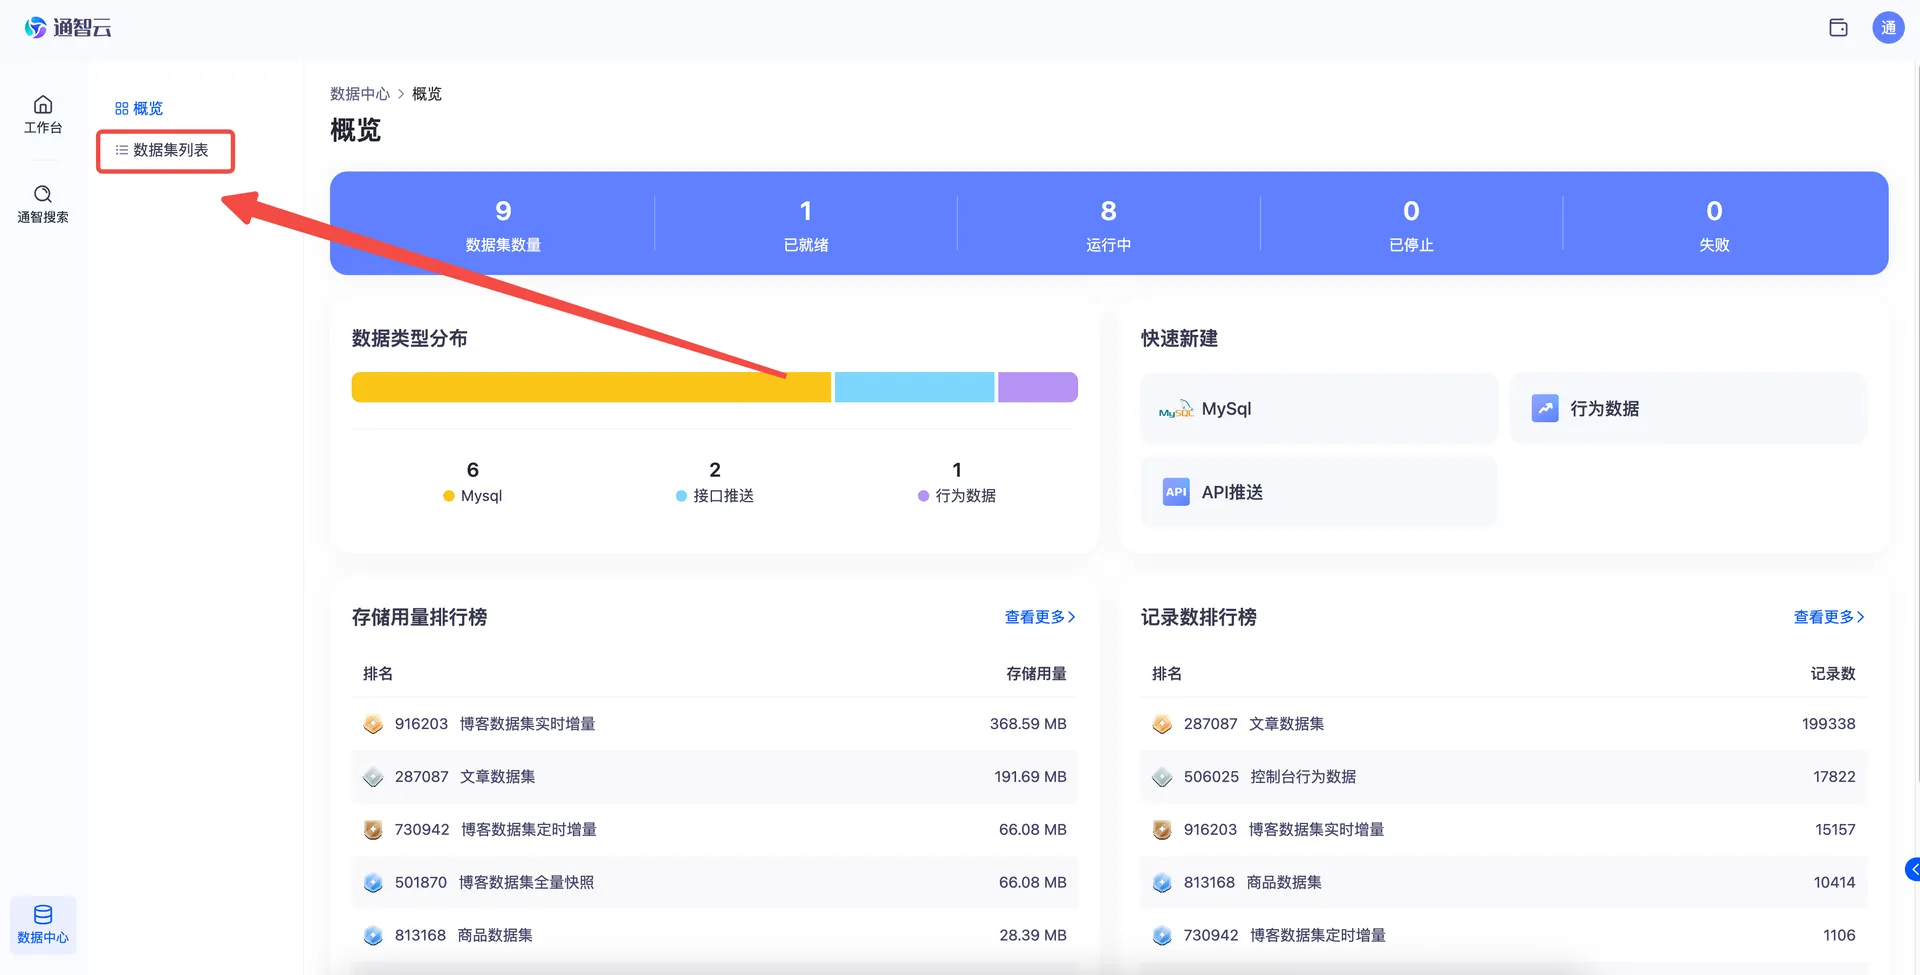
Figure 3-3 The "Dataset List" entry on the overview page -
The list is sorted by creation time in descending order. Newly created datasets are named automatically by the system.
-
Click a dataset name to open its detail page.
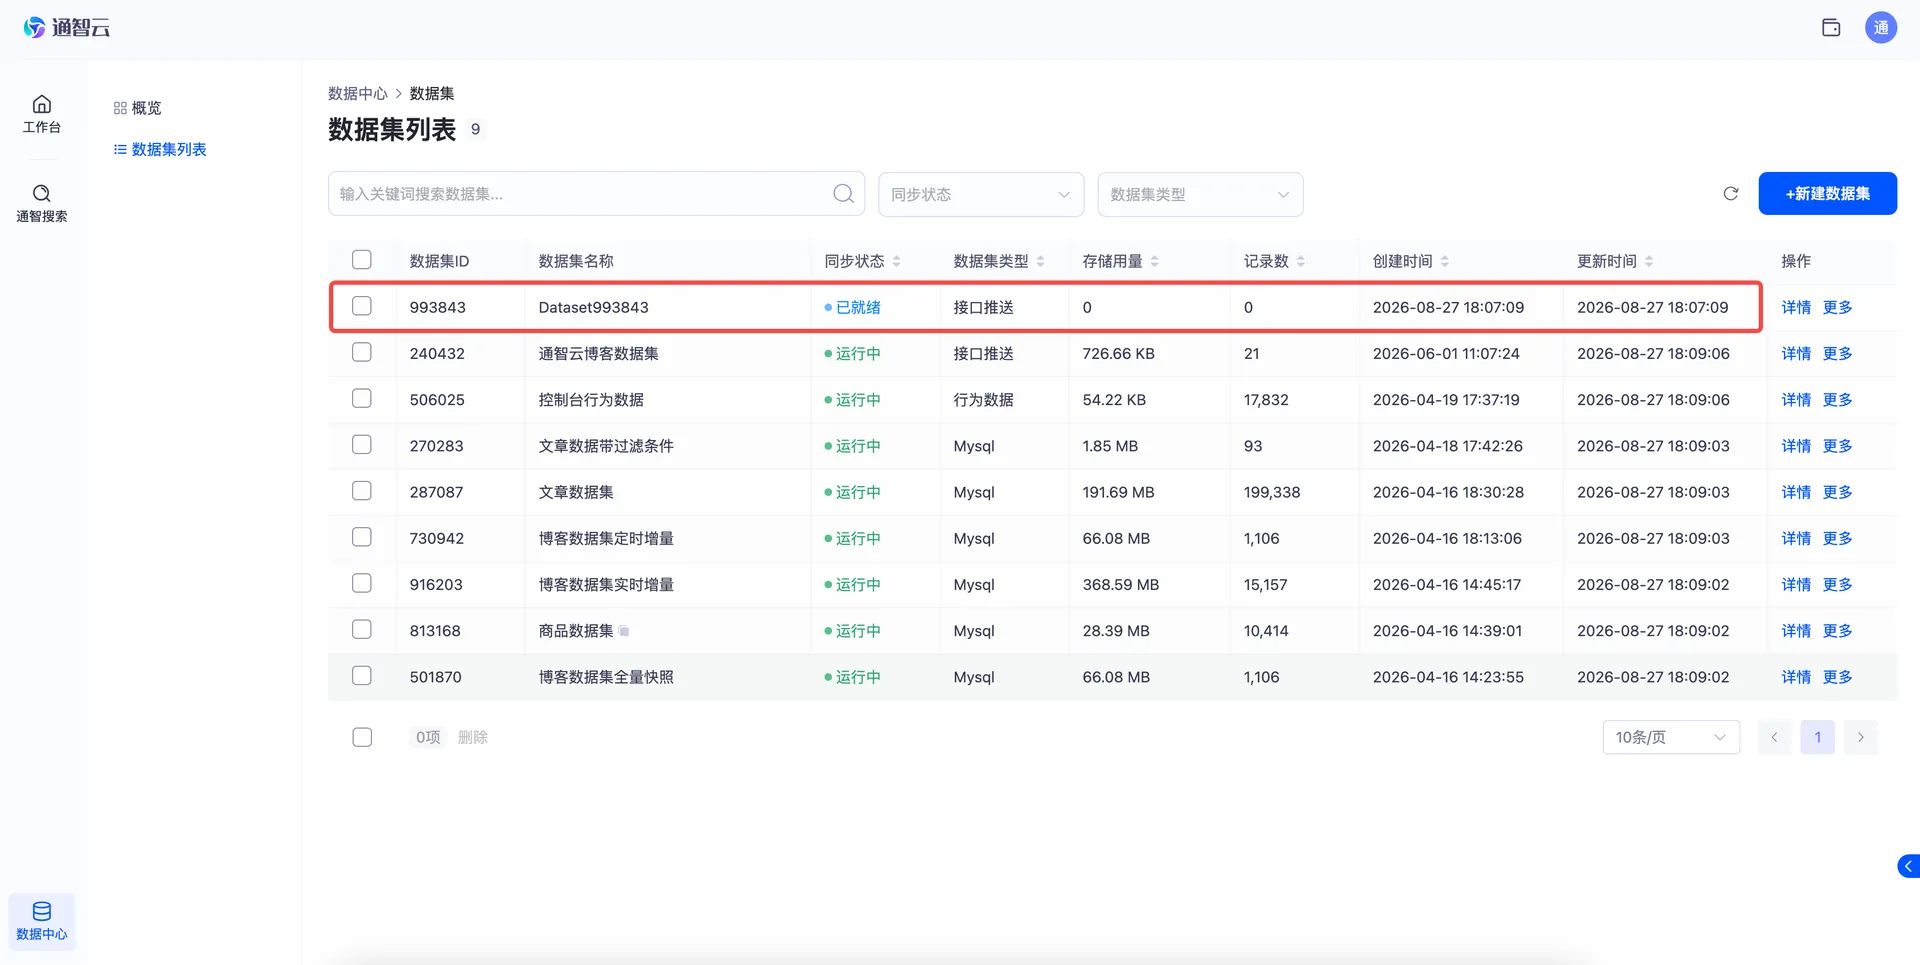
Figure 3-4 The dataset list page
Step 3: "Basic Info" on the detail page
The dataset detail page mainly contains "Basic Info", "Field List", "Preview", and other areas. "Basic Info" provides the following functions:
| # | Function | Description |
|---|---|---|
| 1 | Rename | Click the edit button next to the dataset name to set the dataset name |
| 2 | Start Sync | Begin receiving pushed data; if syncing has not started, the dataset rejects incoming data |
| 3 | Connection Settings | View the data push address and the corresponding API Key |
| 4 | How to push data? | Click to open the data push instructions on the right side of the page |
| 5 | Field Mapping | View all fields of the dataset; right after creation there is only the ID field. Once data is pushed, the full field list appears based on the pushed data structure |
| 6 | Linked Applications | See which applications use this dataset; the dataset cannot be deleted while the linked-application count is not 0 |
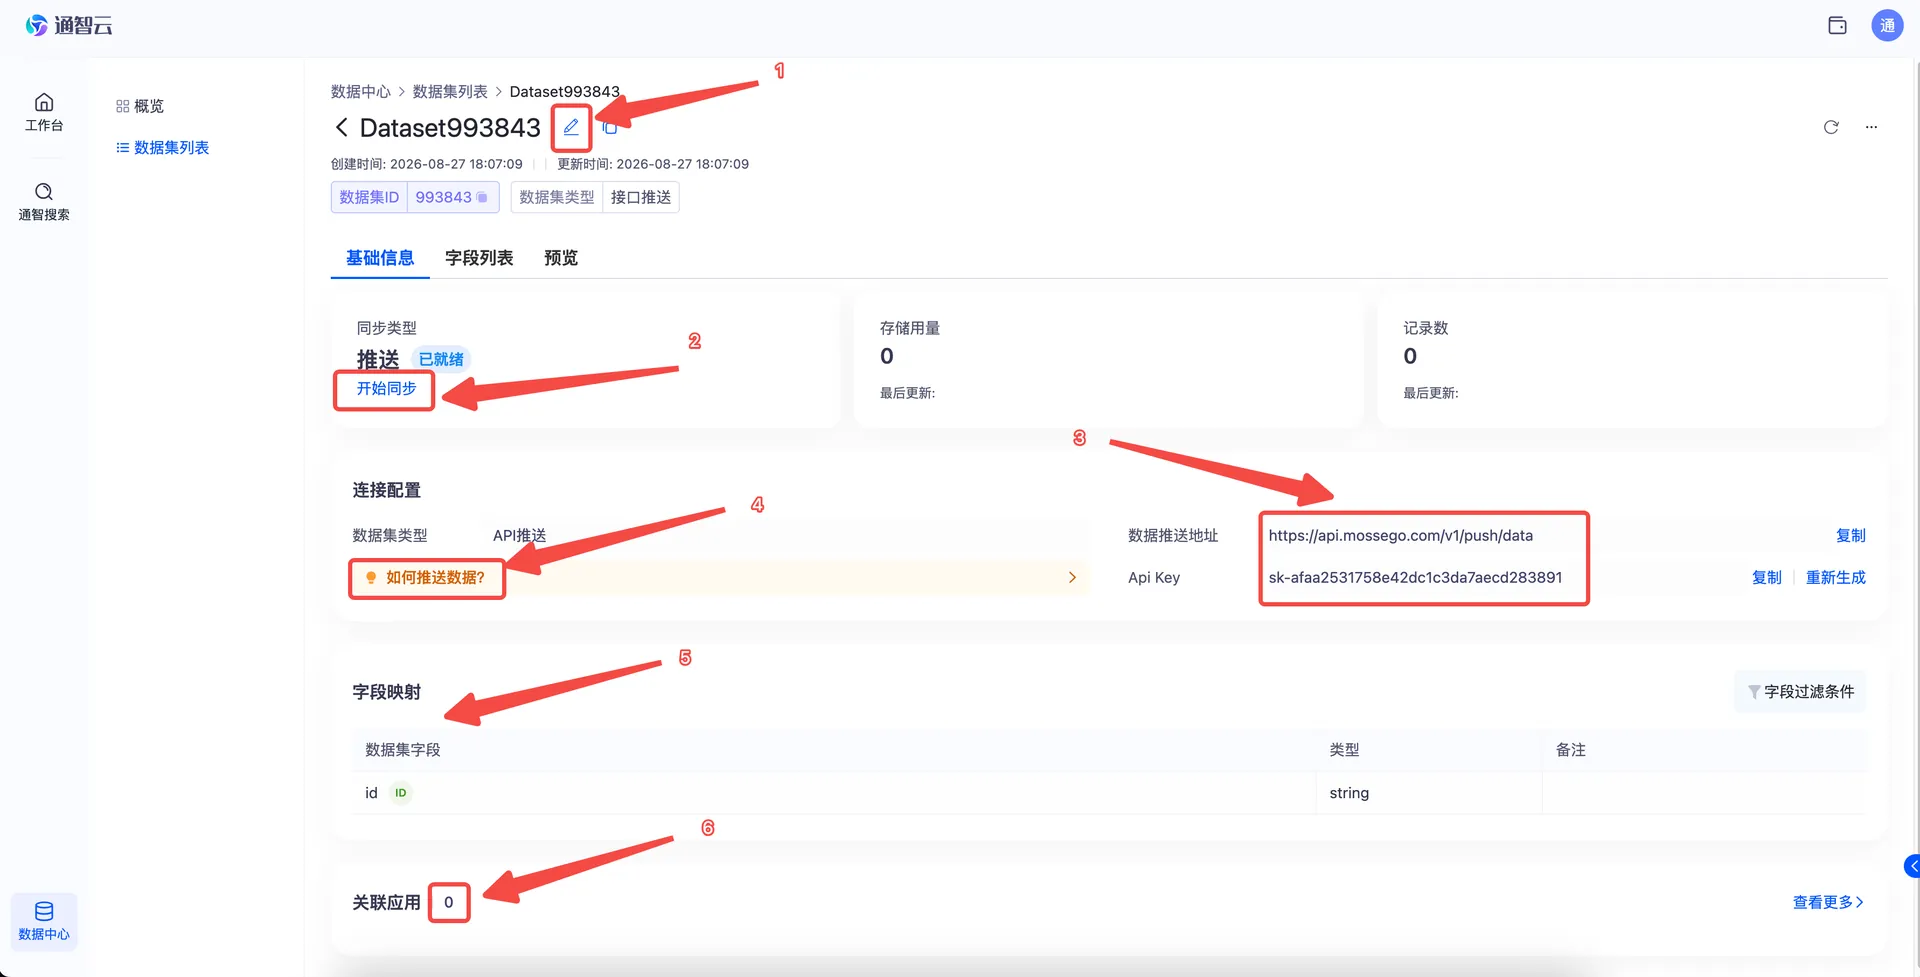
Figure 3-5 The "Basic Info" area of the dataset detail page
⚠️ Caution: The API Key is the credential for pushing data. Keep it safe and never disclose it.
Step 4: Start syncing and push data
After clicking "Start Sync" on the detail page, follow the data push instructions to push data to the dataset.
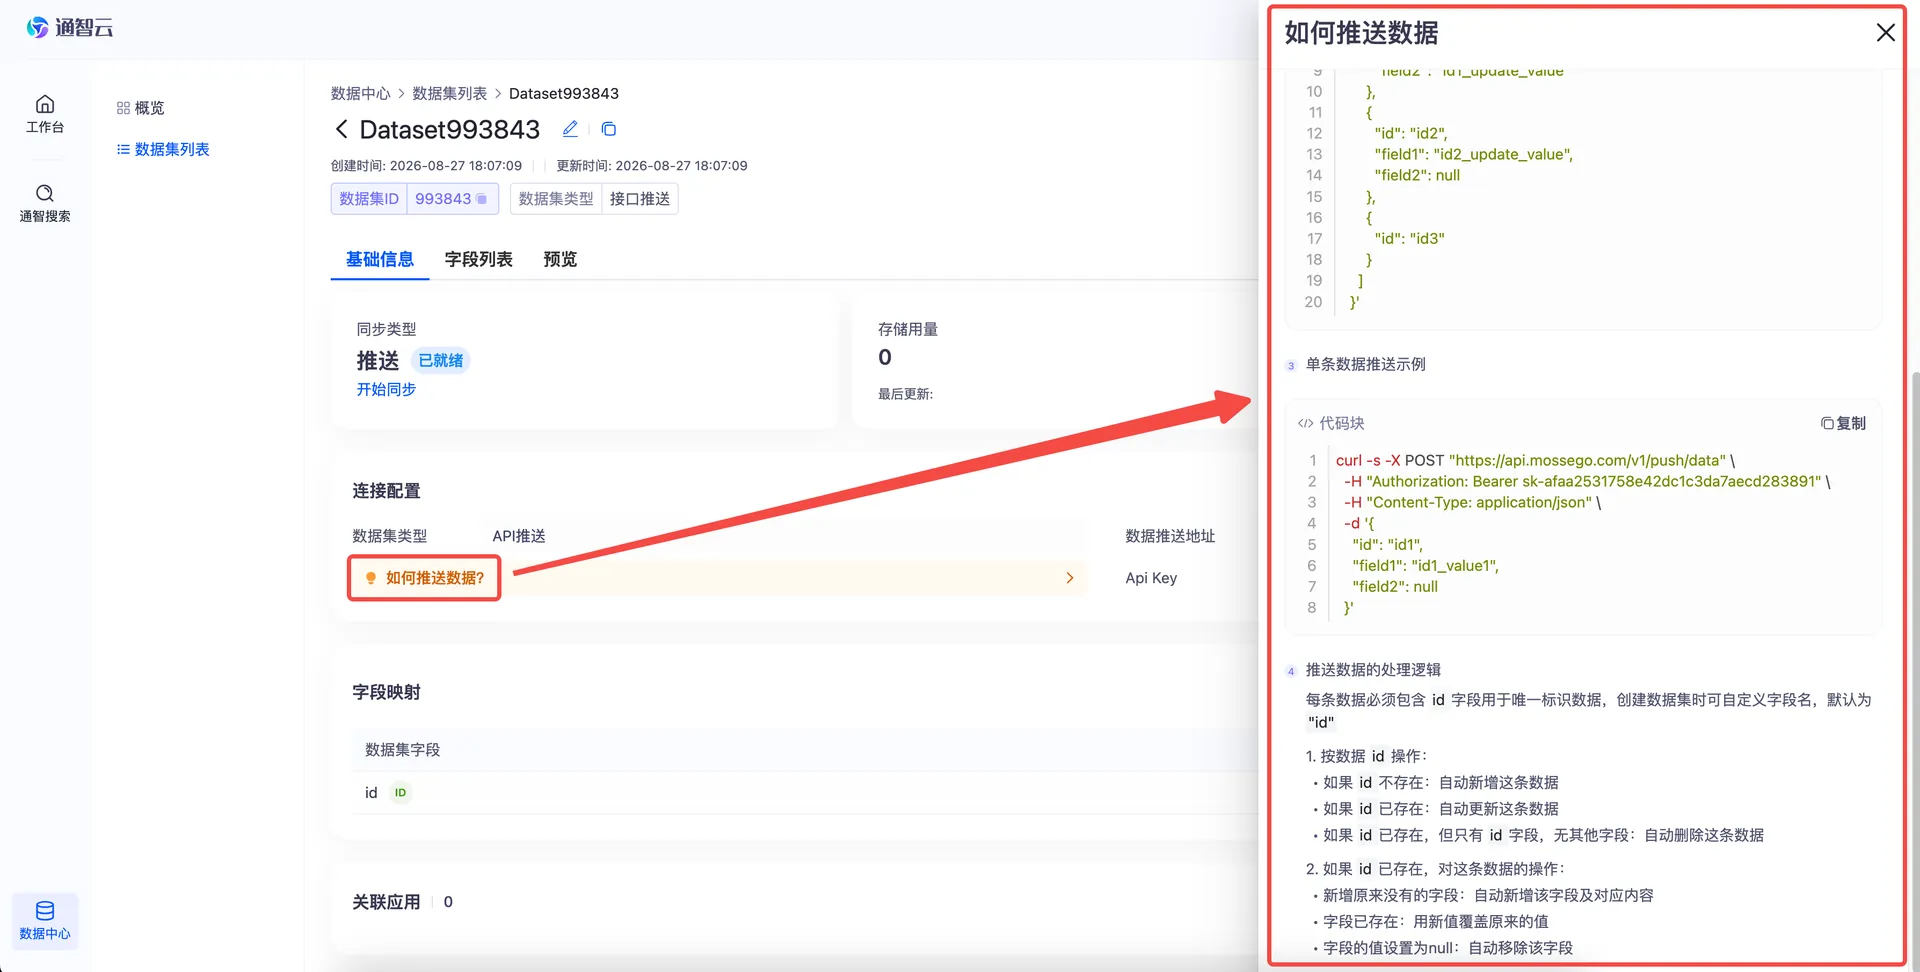
Figure 3-6 Push data following the instructions after starting sync
4. Creating a MySQL Dataset
When to use: your data is already prepared and stored in a single MySQL table. Create a MySQL dataset and the platform syncs the data automatically.
Step 1: Connect to the database
-
On the overview page, click "MySql" in the "Quick Create" area to open the dataset creation page.
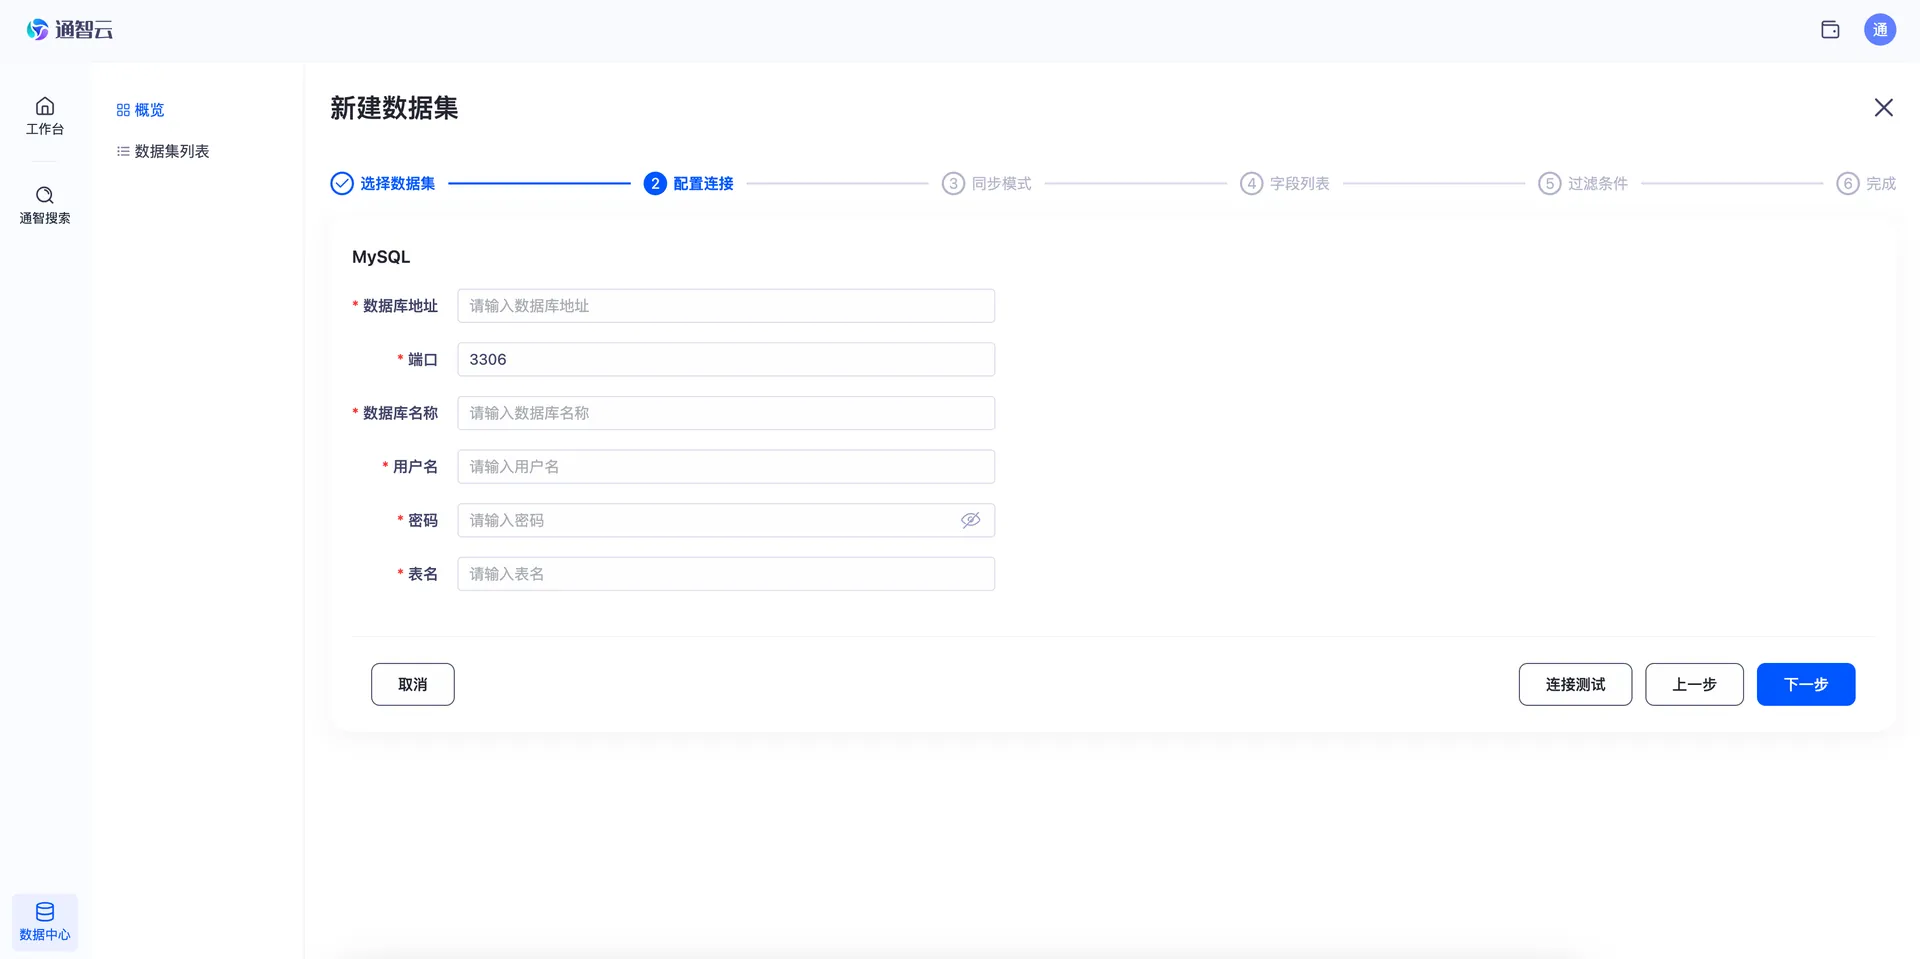
Figure 4-1 Click "MySql" in the "Quick Create" area -
Enter the database connection information and click "Test Connection". After the test passes, click "Next".
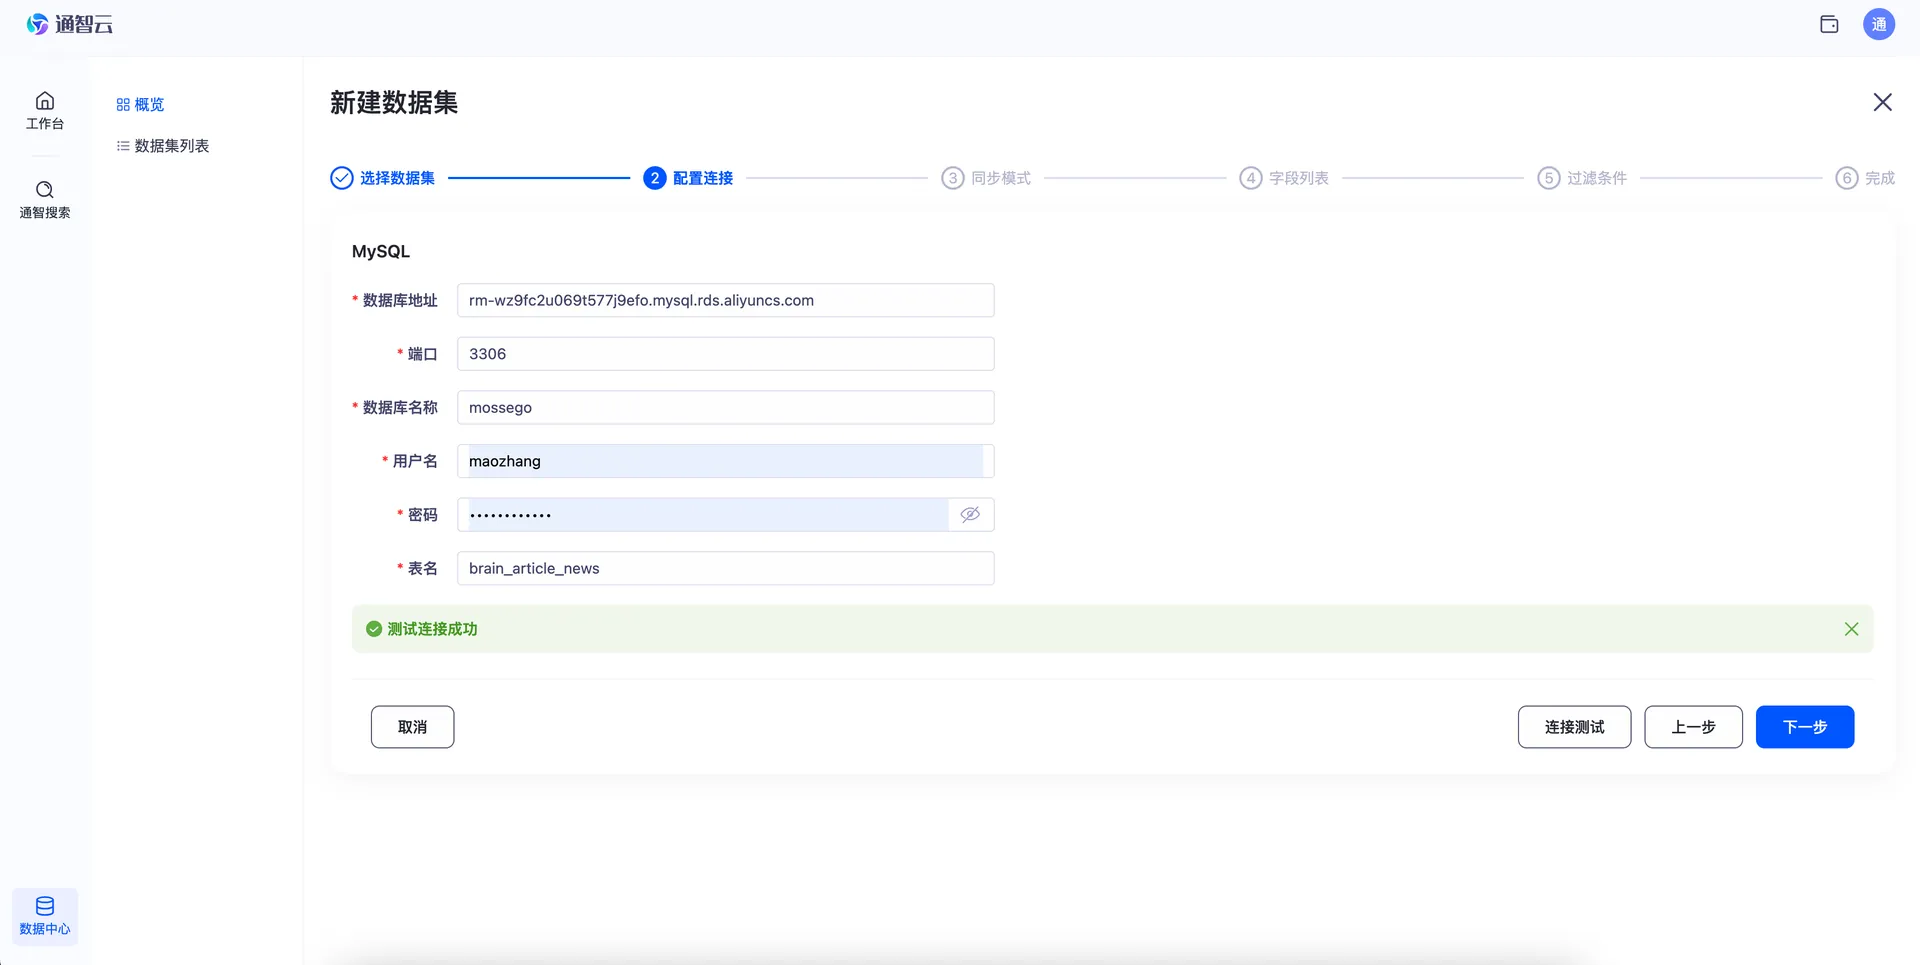
Figure 4-2 Enter database connection info and run the connection test
Step 2: Choose a sync mode
Three sync modes are supported: full snapshot, scheduled incremental, and real-time incremental:
| Sync Mode | Permission Required | Time Field Needed | Update Behavior | Notes |
|---|---|---|---|---|
| Full snapshot | SELECT permission only | No | Syncs once; no incremental data afterwards | Not recommended for more than 100,000 rows: syncing takes longer and puts pressure on the data source |
| Scheduled incremental | SELECT permission only | Yes: you must specify a valid time field and set the sync interval | Syncs on the schedule you set | The time field must be a real, valid time type or timestamp; incorrect field contents cause data confusion |
| Real-time incremental | Additional permissions required (syncs via binlog) | No | Real-time updates | Syncing continuously occupies a database connection; assess the data source load before enabling it |
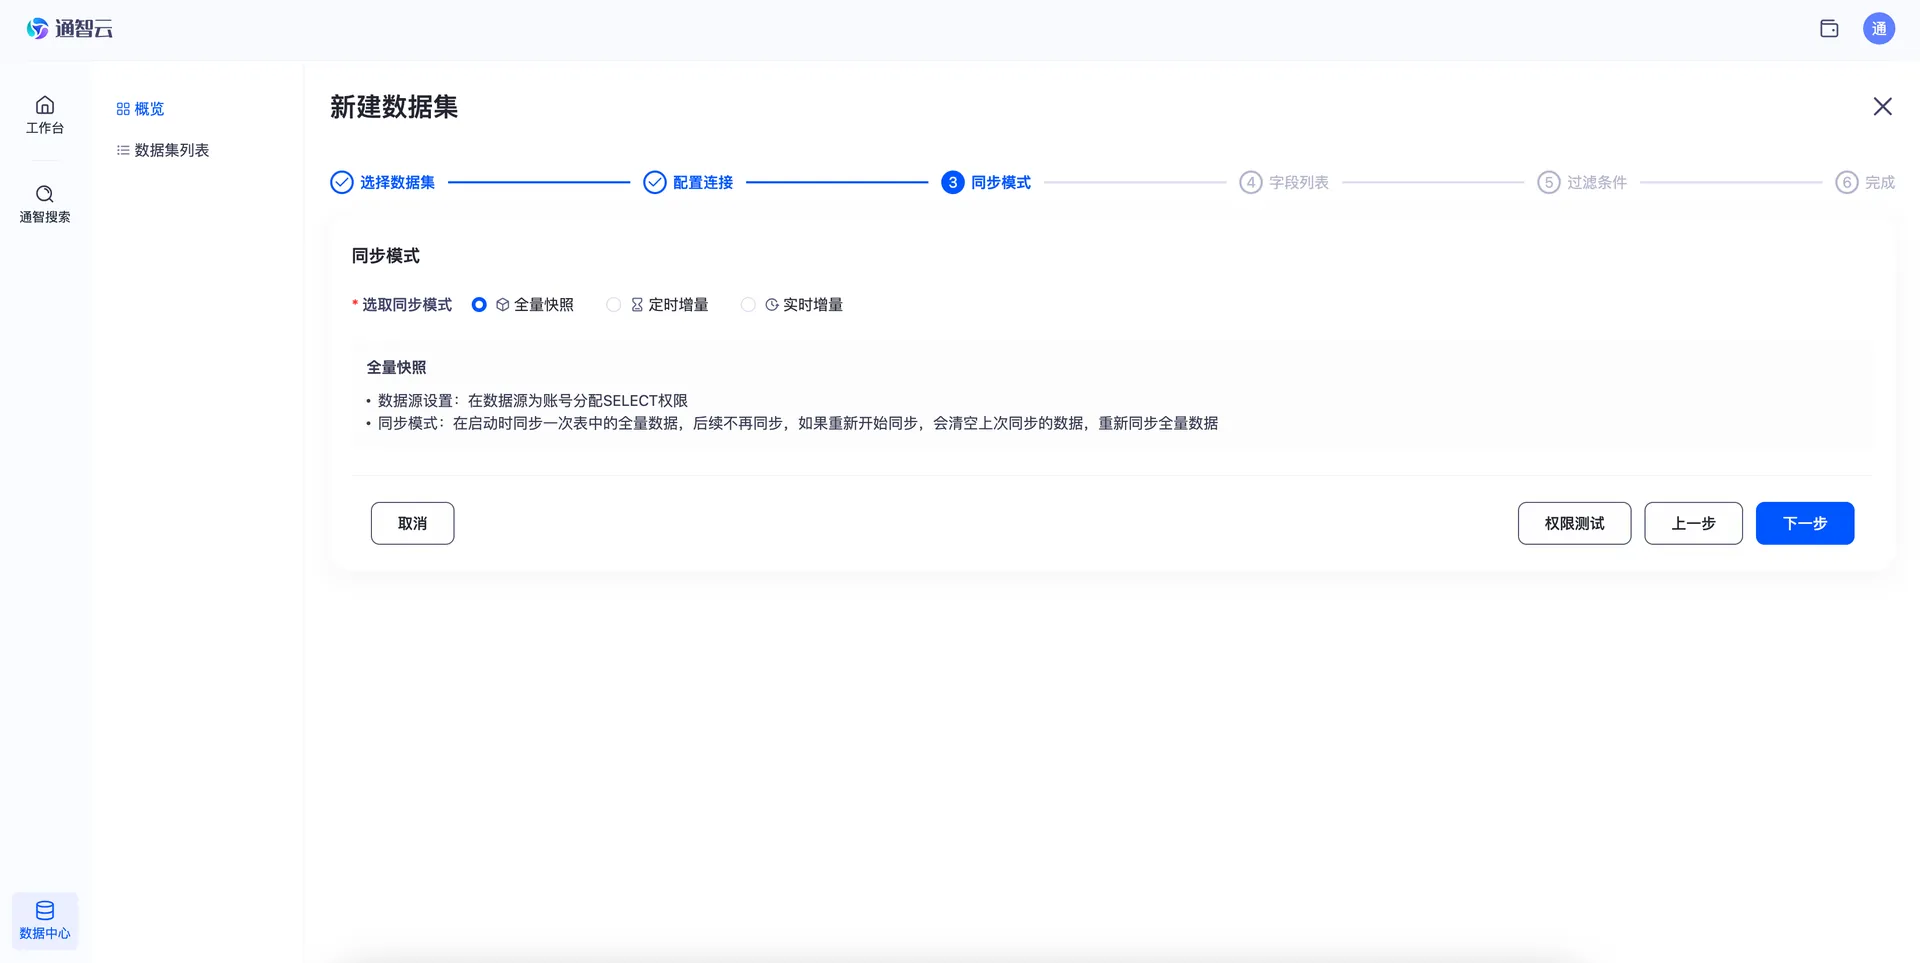
Figure 4-3 Full snapshot mode
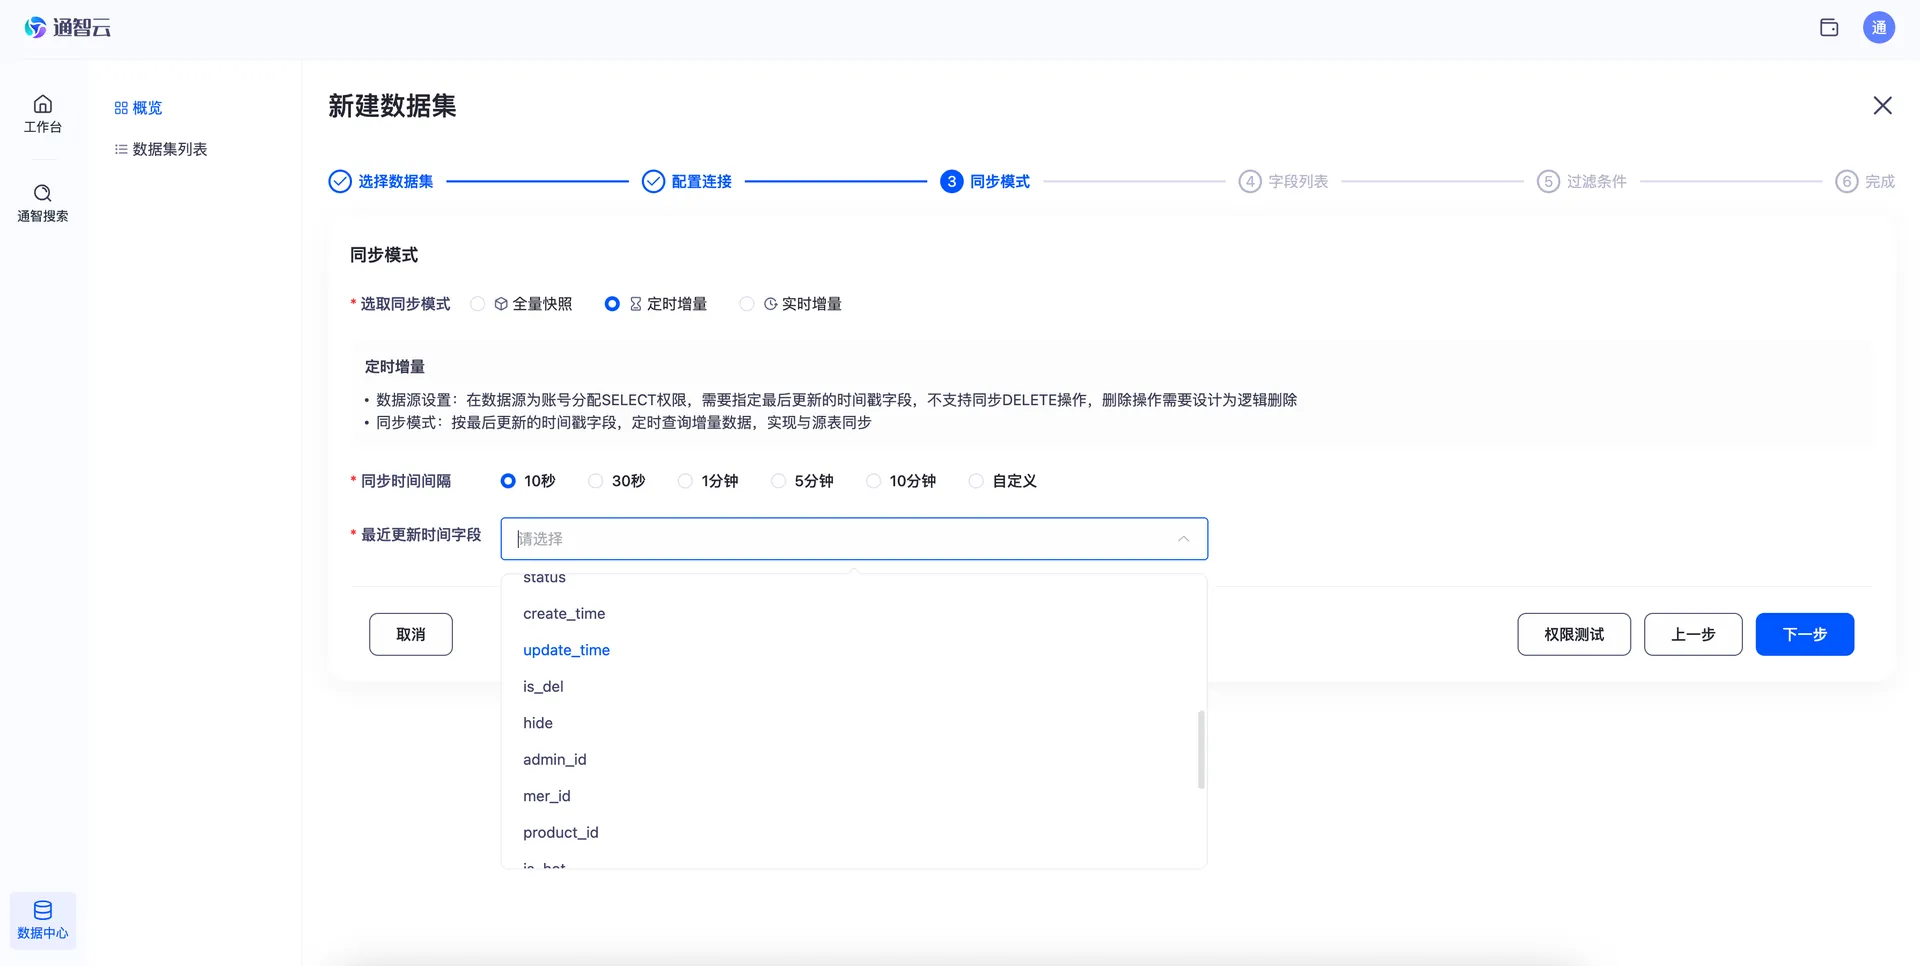
Figure 4-4 Scheduled incremental mode
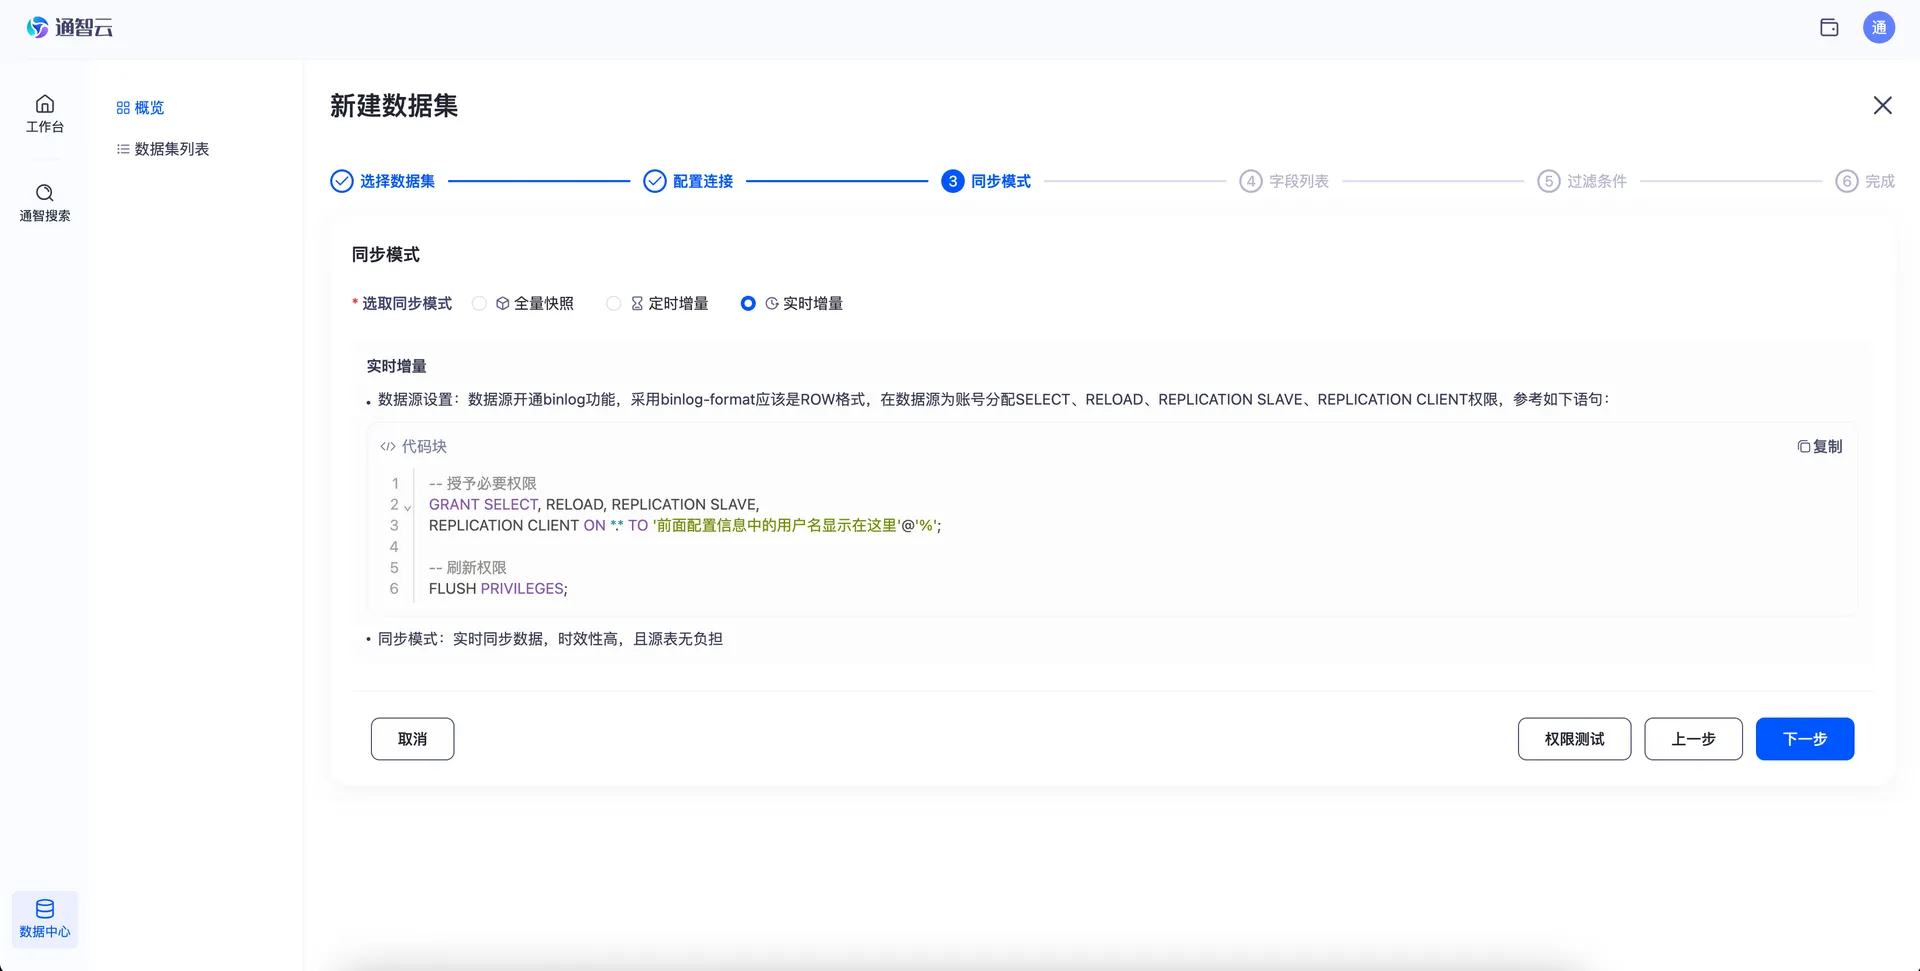
Figure 4-5 Real-time incremental mode
Step 3: Set field mapping
After the permission test passes, click "Next" to enter the field mapping settings:
-
Set the ID field: every dataset must have exactly one ID field, which uniquely identifies each record. The table's primary key is not necessarily the ID field — select the target field and click "Set as ID Field".
-
Field name mapping: you can set dataset field names, mapping data source field names to dataset field names. By default they stay the same as the source field names.
-
Field comments: you can edit the comments of dataset fields. By default they stay the same as the source field comments.
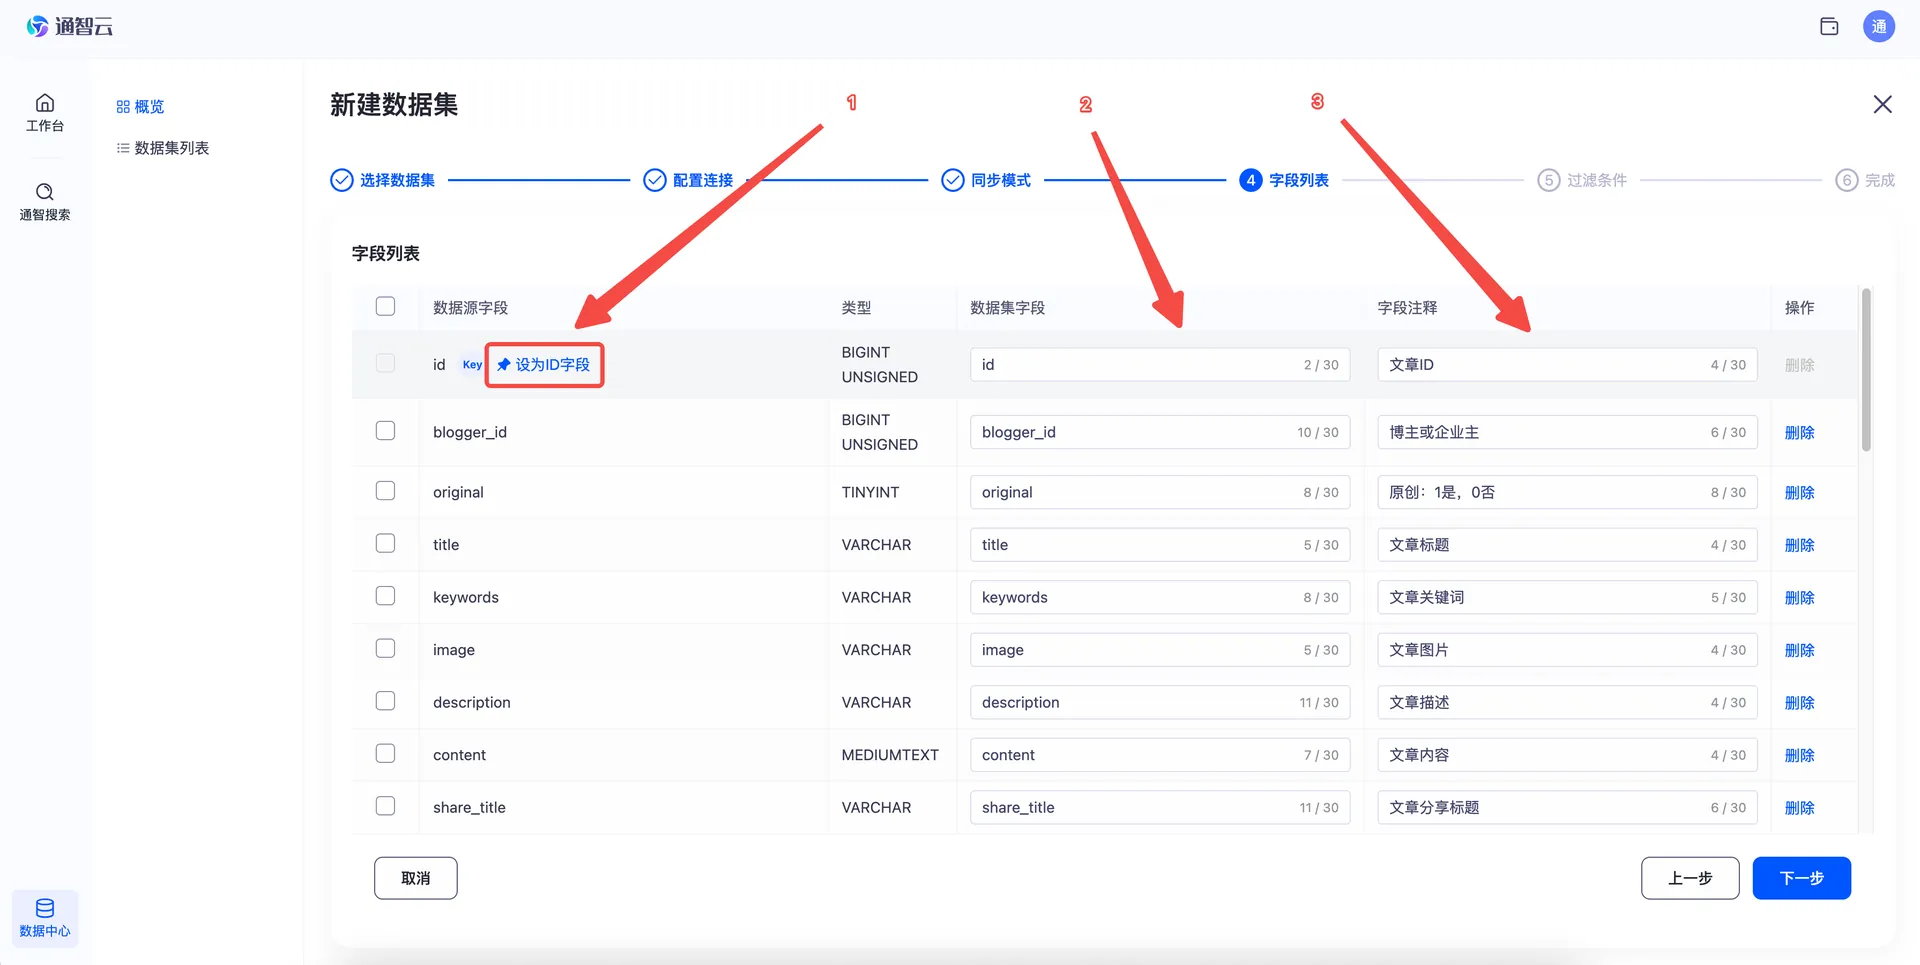
Figure 4-6 Field mapping settings
Step 4: Set filter conditions (optional)
Click "Next" to set filter conditions for the sync. These conditions are applied during syncing to ensure only valid data enters the dataset; if you do not need filtering, skip this step.
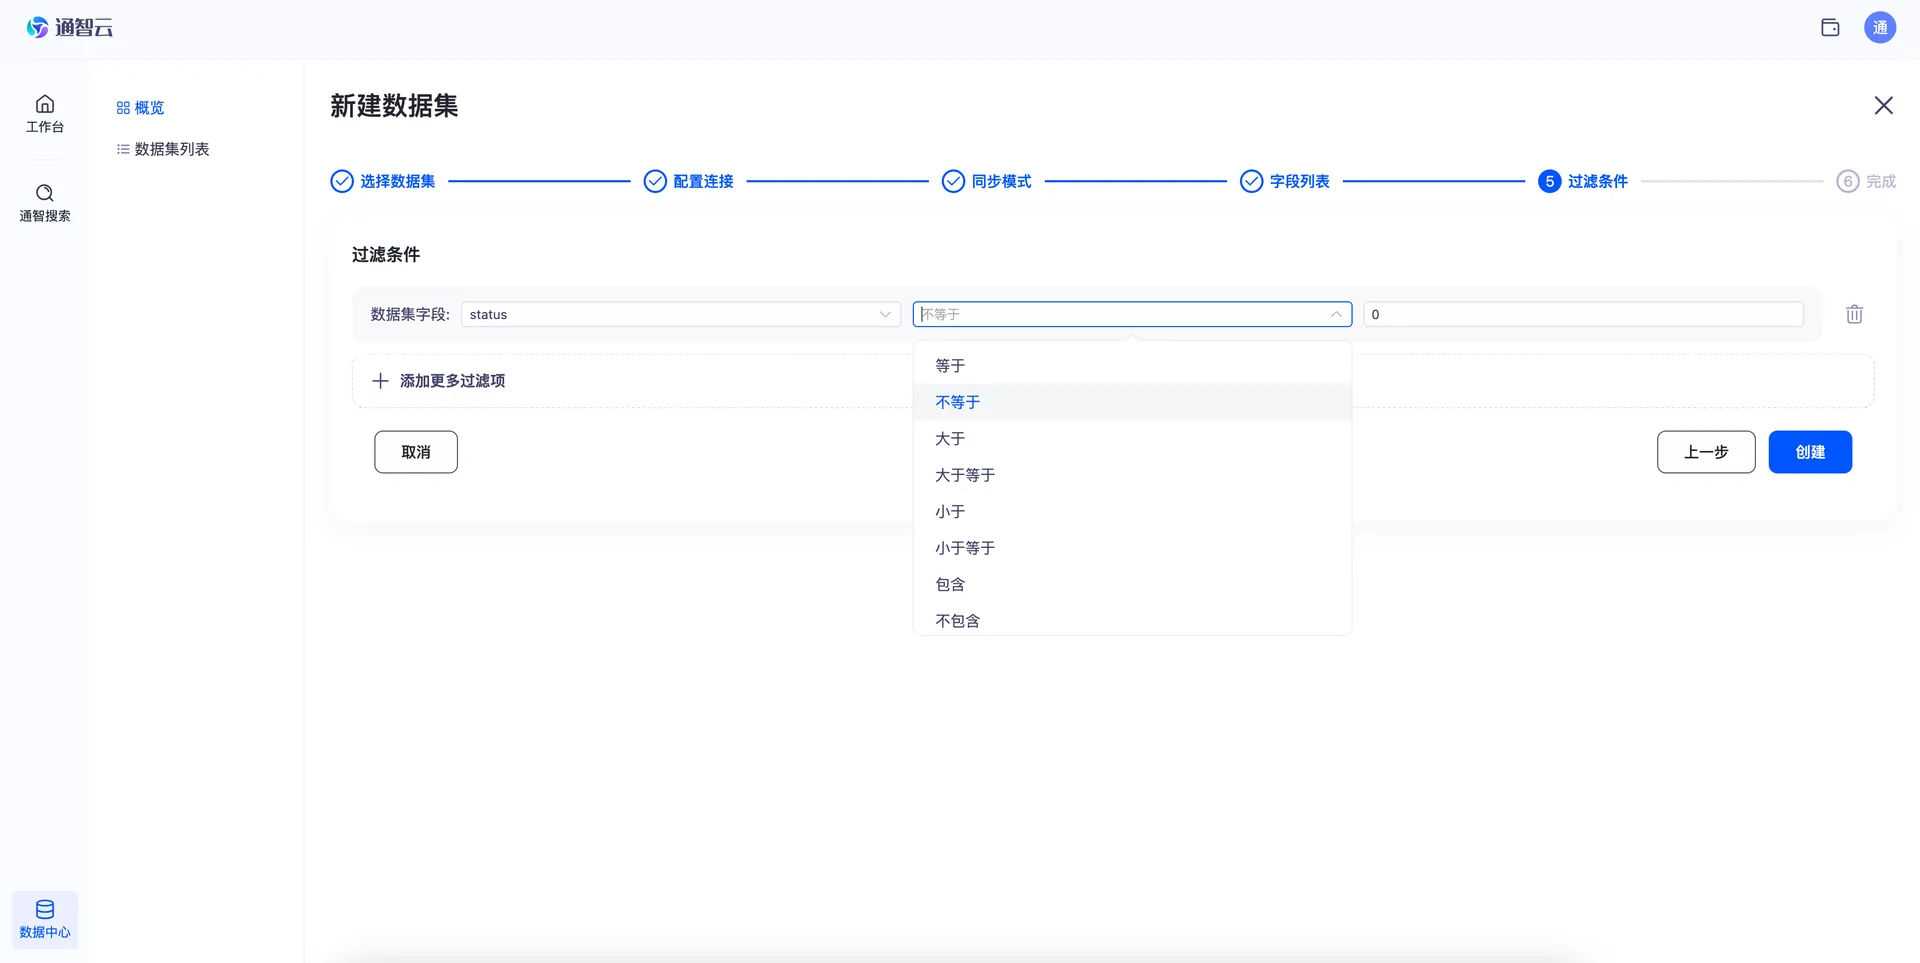
Figure 4-7 Sync filter condition settings
Step 5: Create and start sync
-
Click "Create" to create the MySQL dataset with the configuration above.
-
Return to the MySQL dataset detail page and click "Start Sync" in the "Basic Info" area to start dataset syncing.
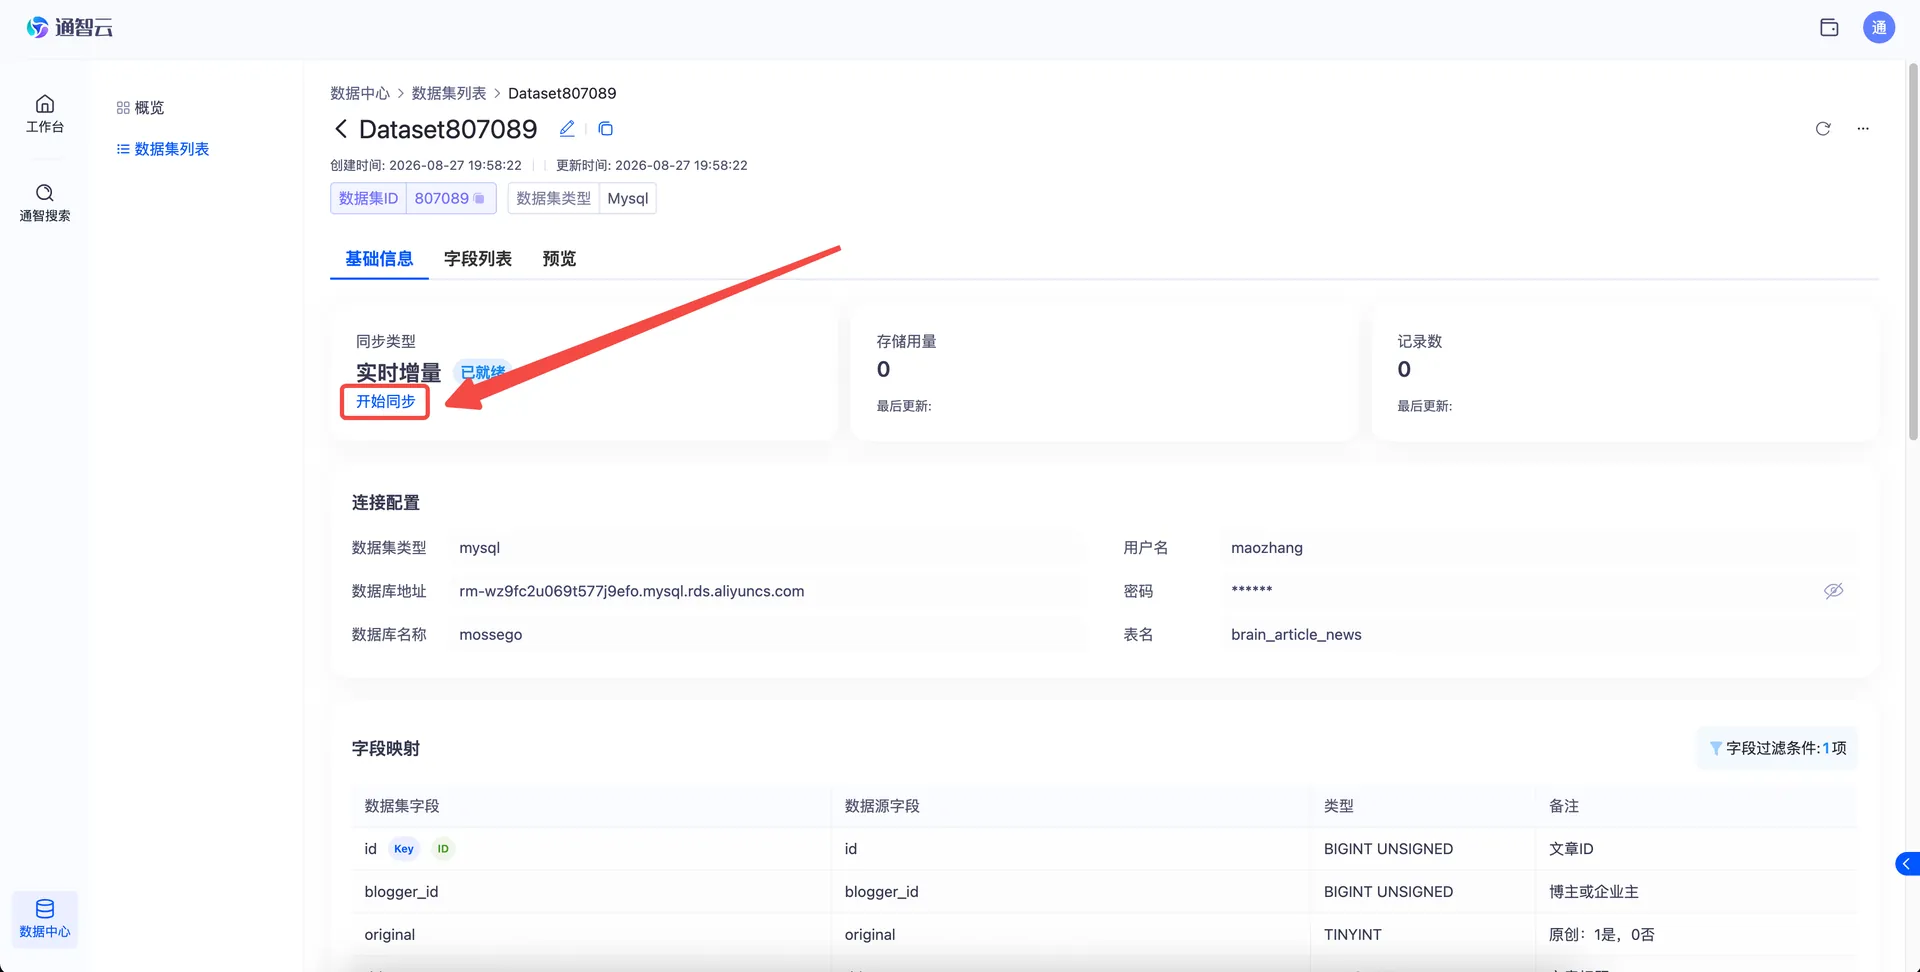
Figure 4-8 Click "Start Sync" on the detail page
5. Creating a Behavior Dataset
When to use: you need to collect user behavior data on your pages.
Step 1: Create the dataset
-
On the overview page, click "Behavior Data" in the "Quick Create" area to open the dataset creation page.
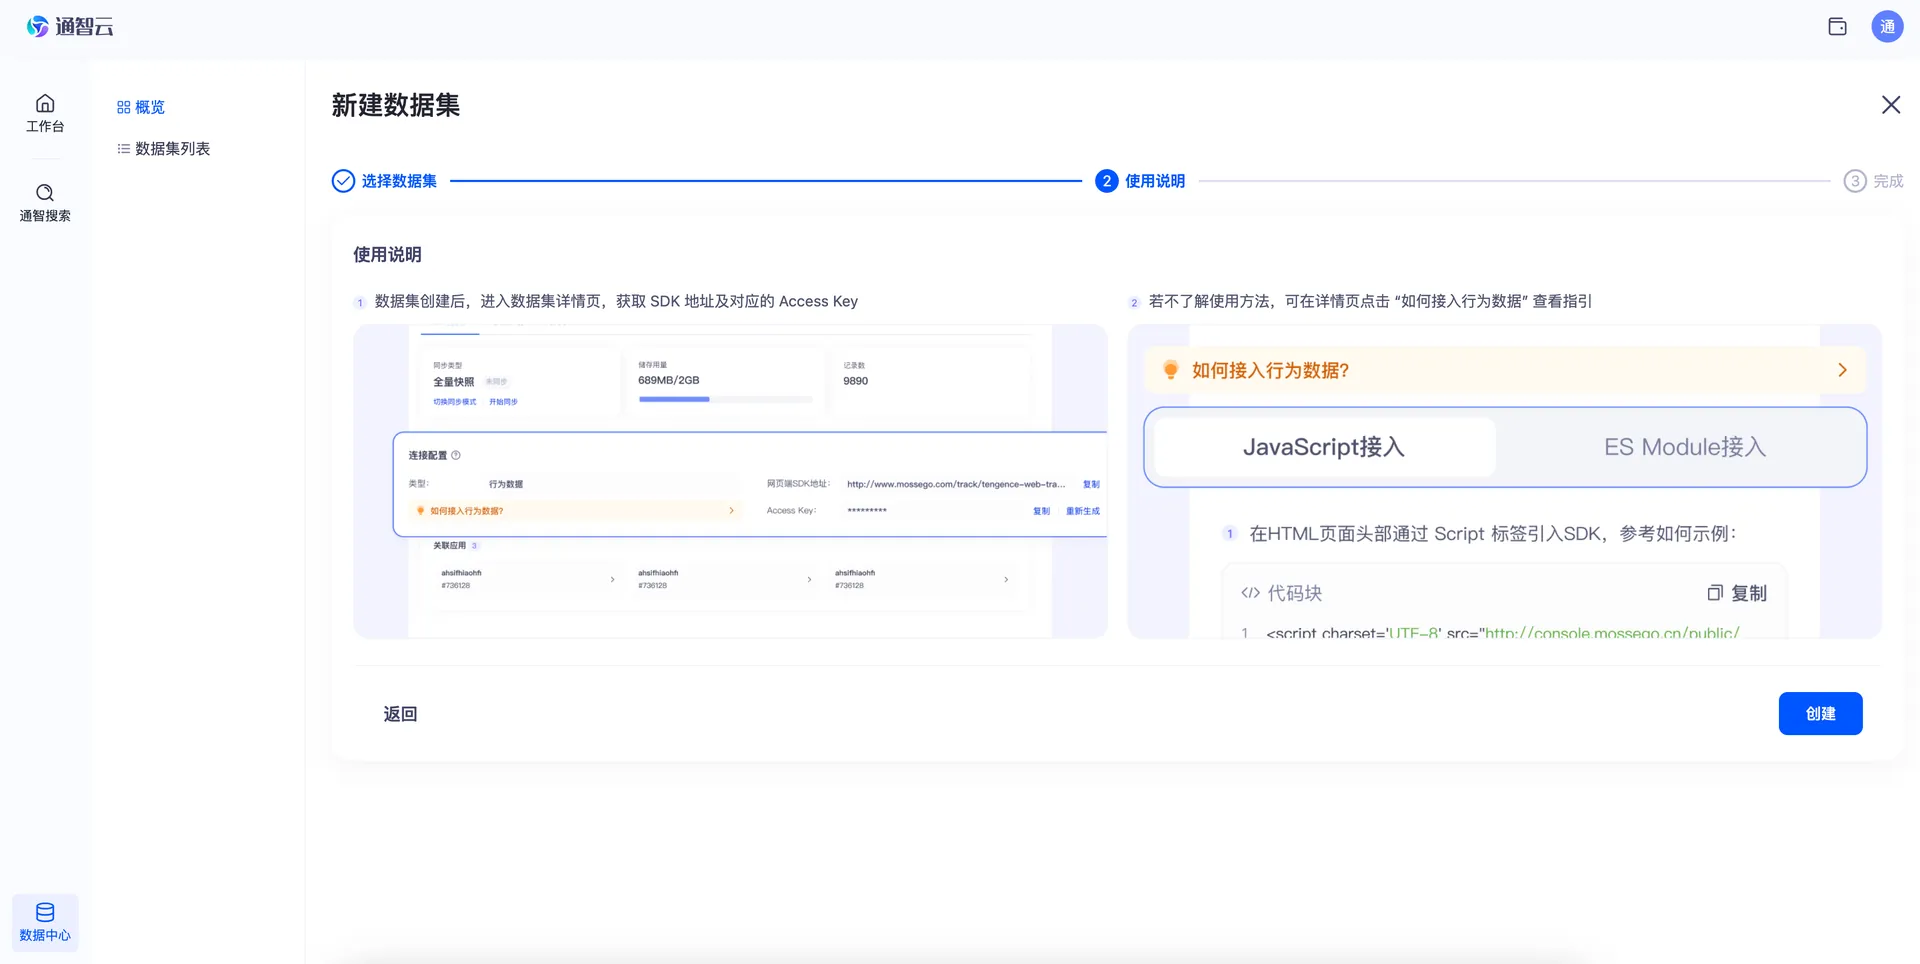
Figure 5-1 Click "Behavior Data" in the "Quick Create" area -
The behavior dataset is fed automatically by the behavior data SDK, and its data structure is determined by the SDK, so no manual field definition is needed — just click "Create".
Step 2: "Basic Info" on the detail page
Back on the behavior dataset detail page, the "Basic Info" area provides:
-
Click "Start Sync" to start dataset syncing; only after syncing starts can the dataset receive data reported by the SDK.
-
Click "How to integrate behavior data" and the integration instructions open on the right side of the page.
-
In the "Connection Settings" area, you can view the behavior data push address and the corresponding Access Key.
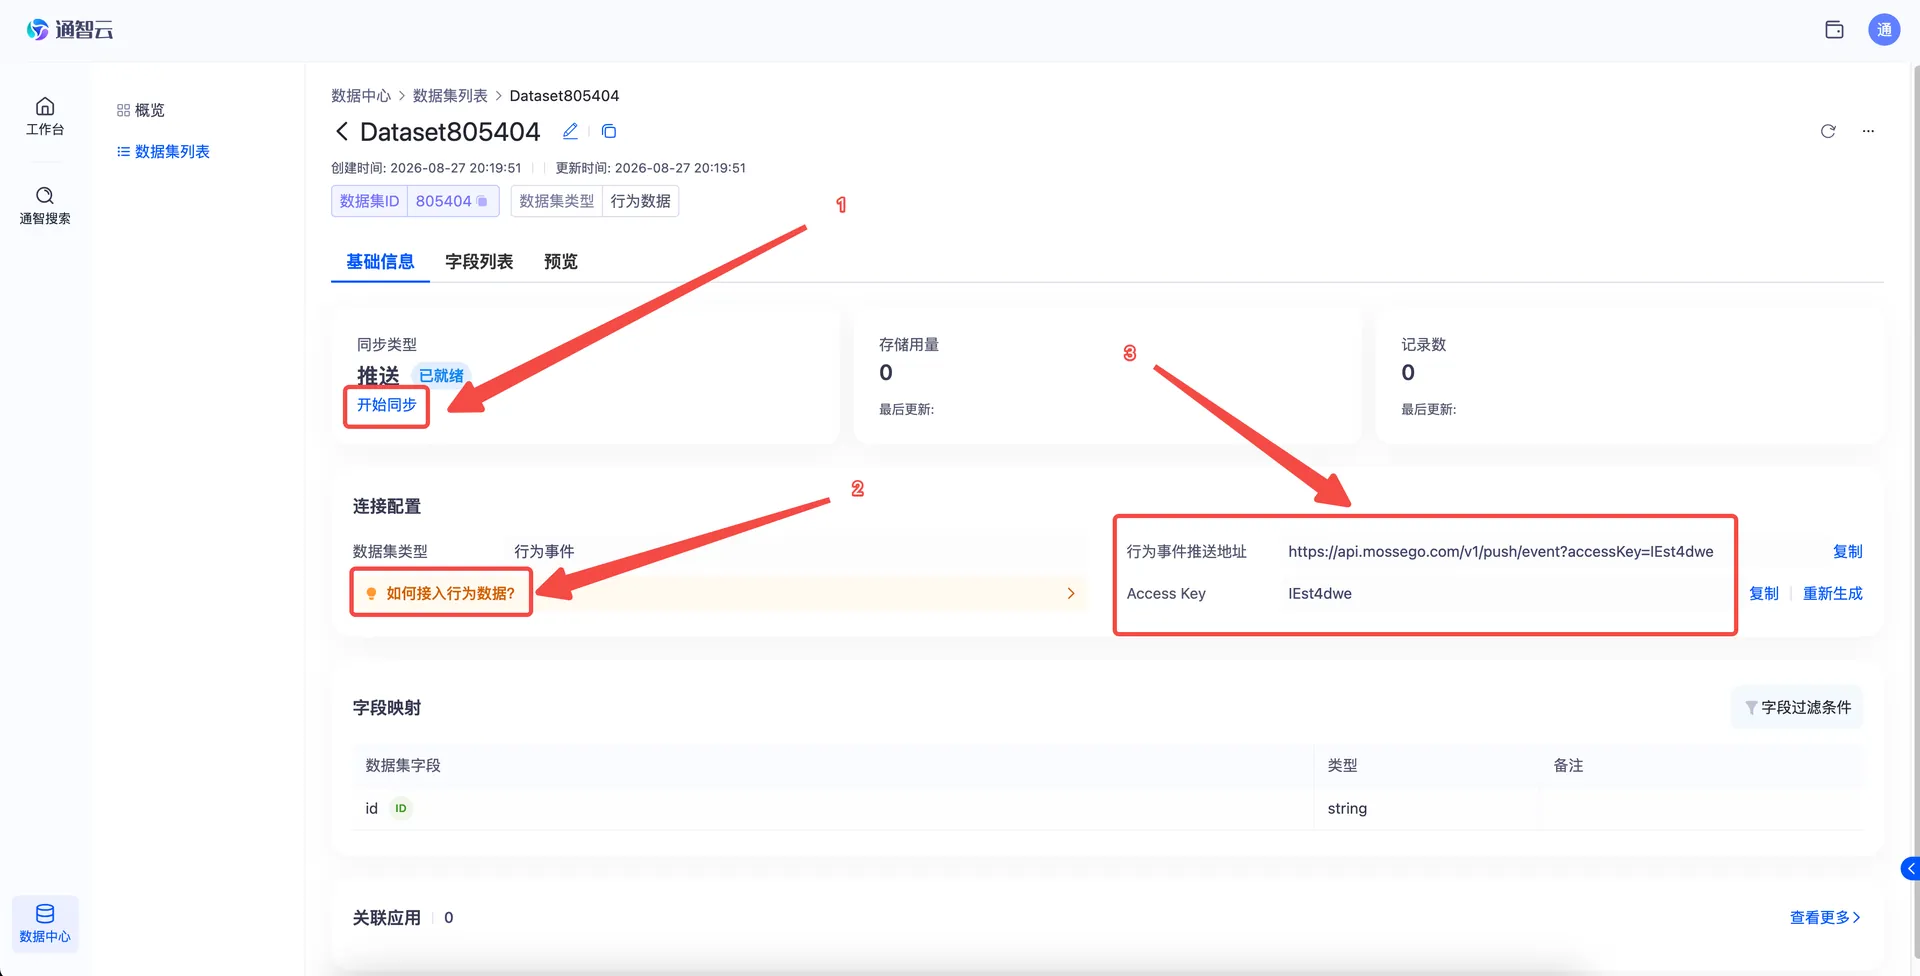
Figure 5-2 The "Basic Info" area of the behavior dataset detail page
Step 3: Start syncing and integrate behavior data
After dataset syncing starts, follow the integration instructions to integrate behavior data on the frontend. The SDK then pushes behavior data automatically.
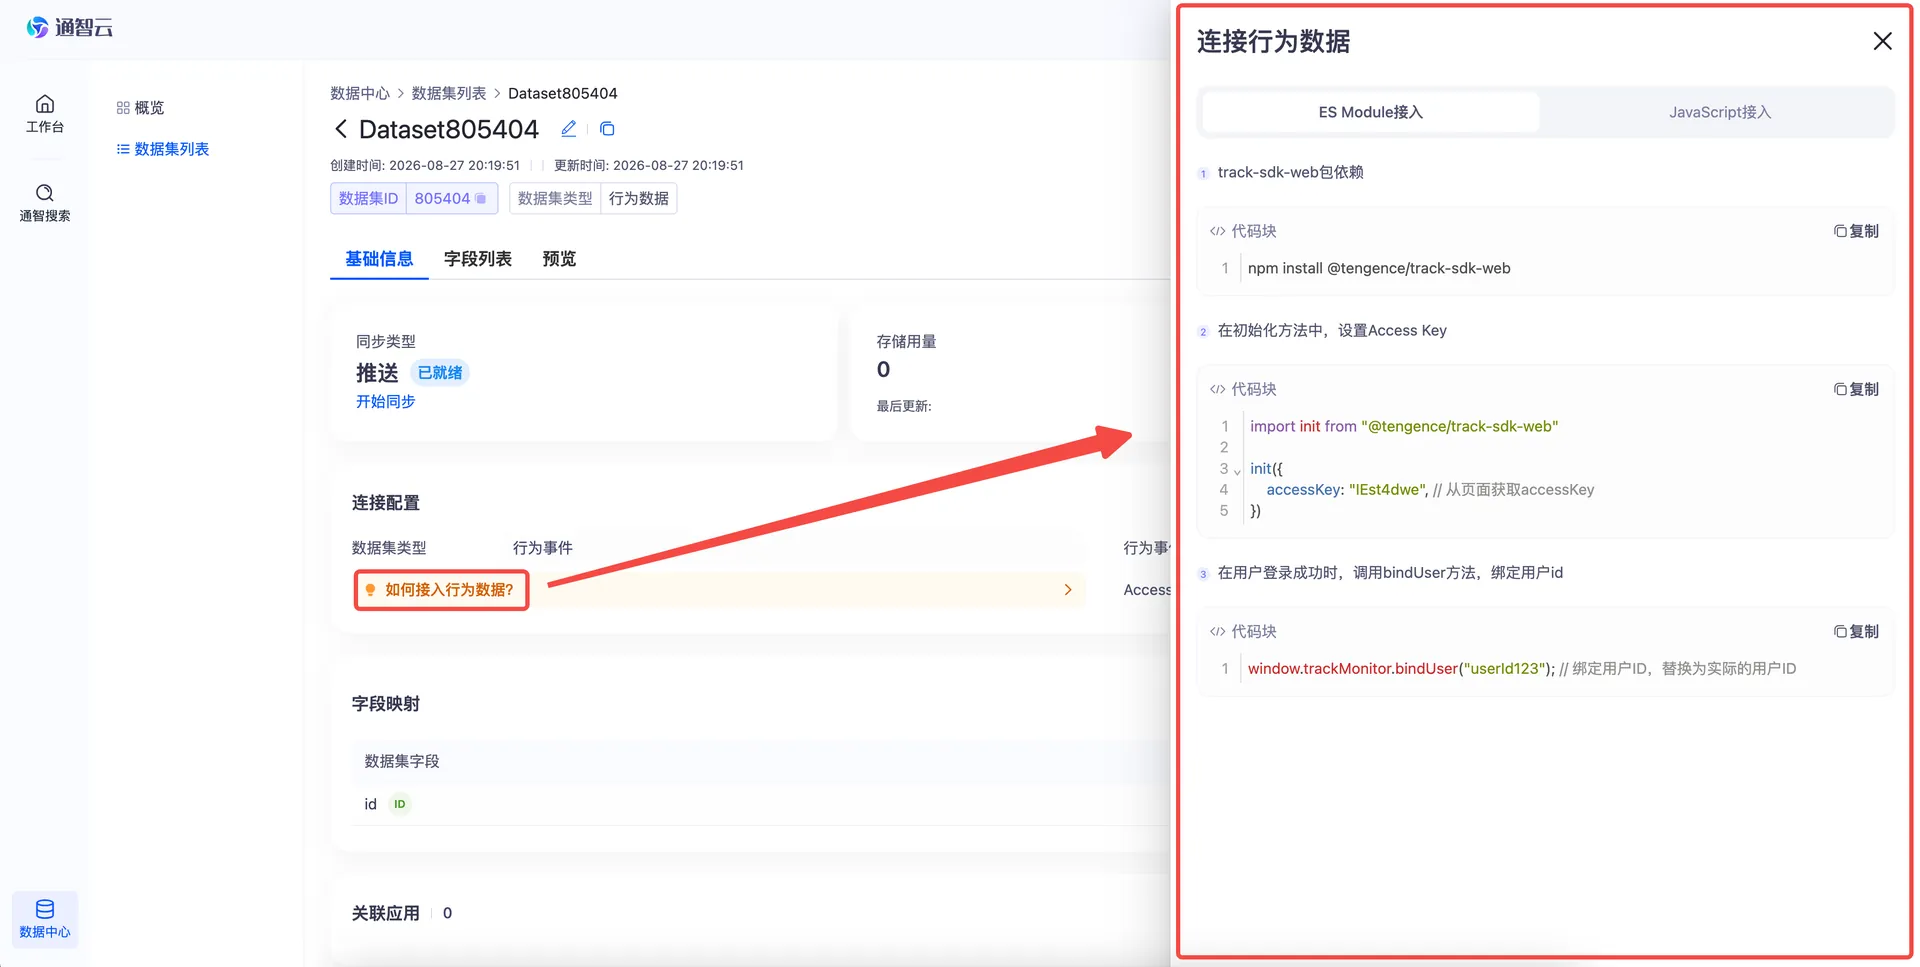
Figure 5-3 Behavior data is reported automatically after SDK integration
6. Viewing and Managing Datasets
Field List and Semantic Tags
After data syncing starts, return to the "Field List" on the dataset detail page to view the full field list of the pushed data. To change field settings, click the "Edit Configuration" button.
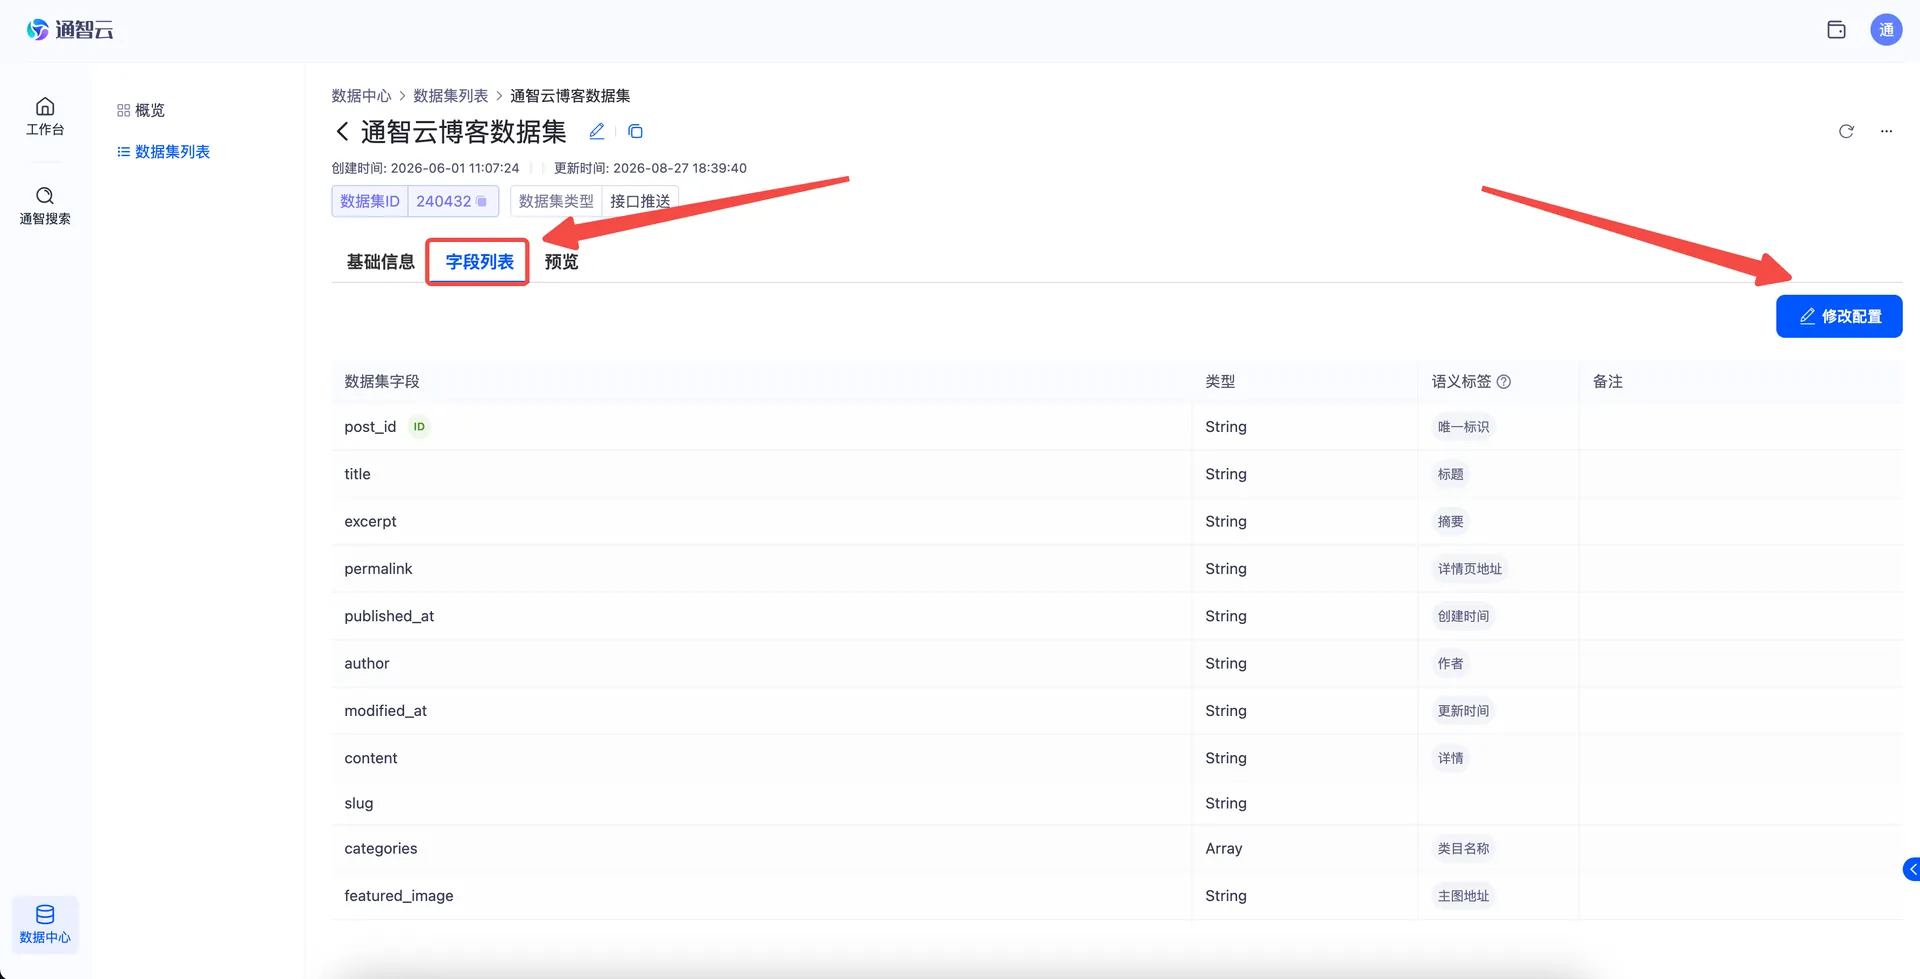
Figure 6-1 The "Field List" and "Edit Configuration"
You can set semantic tags and remarks for fields:
💡 Tip: Semantic tags help the system better understand your business data. We recommend setting them.
-
You can first read the detailed explanation of semantic tags to understand what setting them means;
-
Click "Add Semantic Tag" to set a semantic tag for a field;
-
You can choose a suitable tag from the tag types supported by the system by default;
-
You can also leave them unset for now, and come back to set them later when a feature that depends on semantic tags requires it.
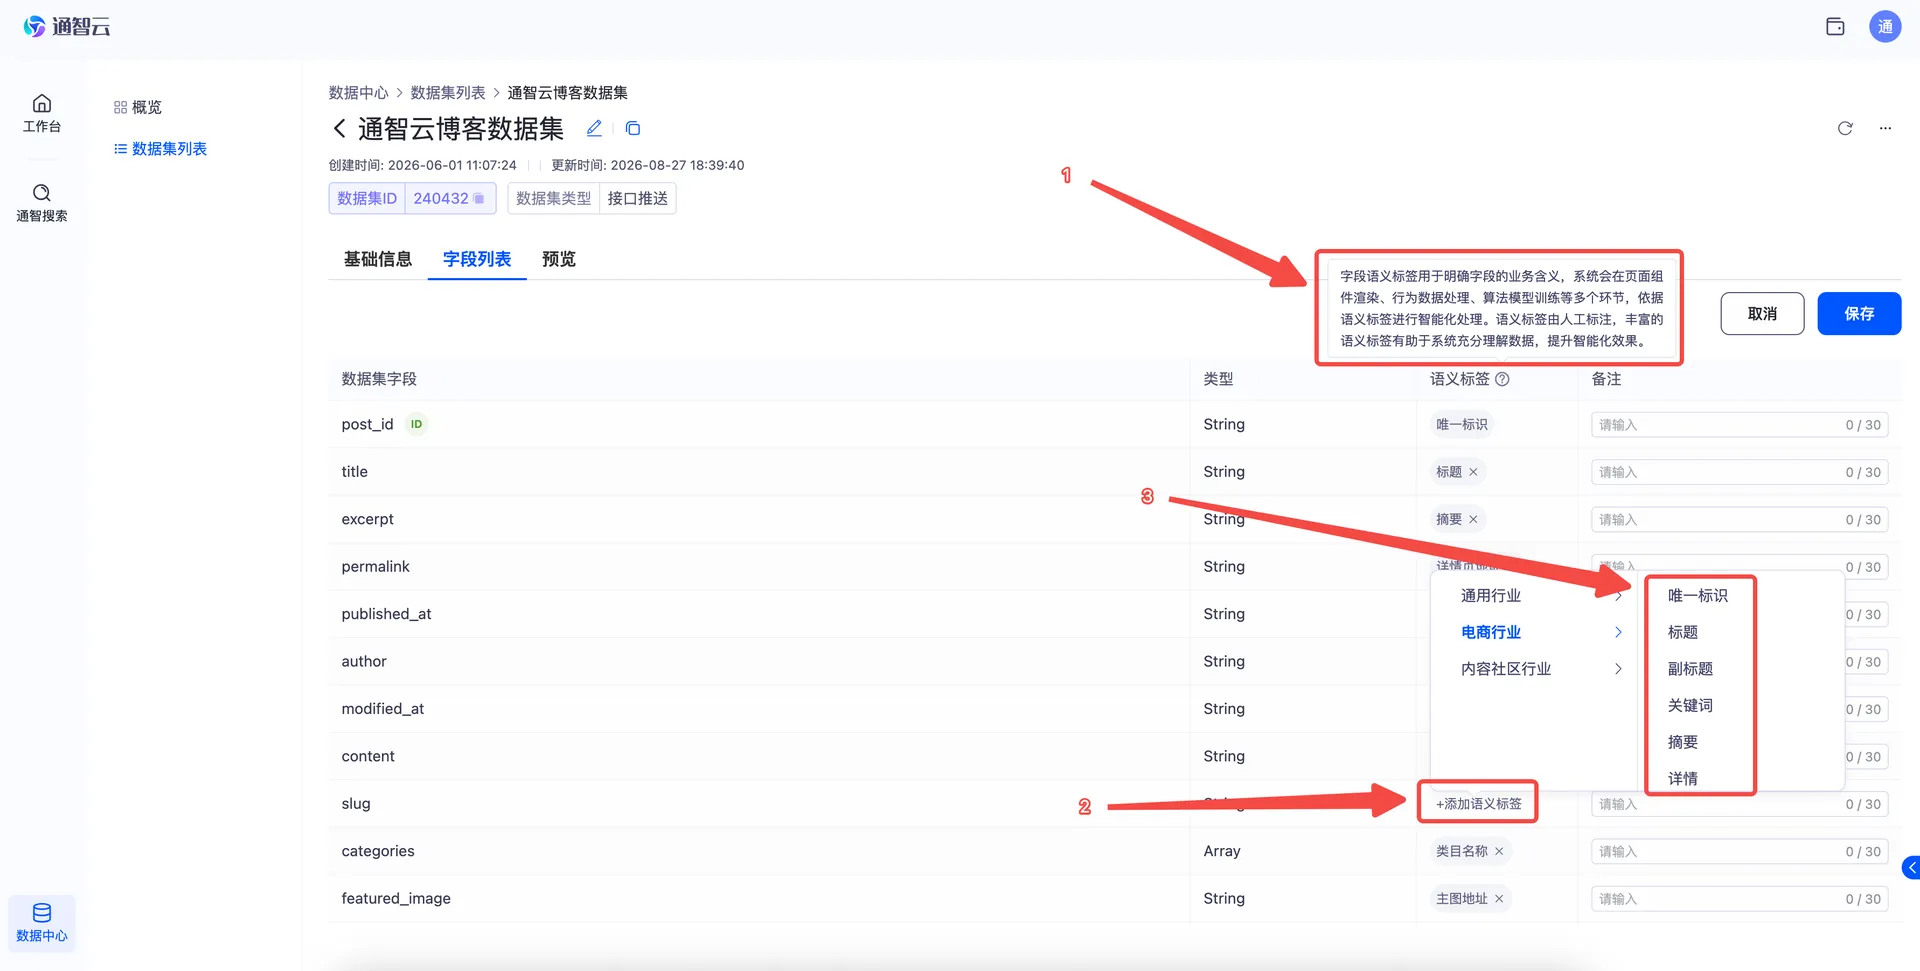
Figure 6-2 Add a semantic tag to a field
Previewing Data
In the "Preview" area of the dataset detail page, you can inspect the pushed data:
-
Click "Preview" and the system samples a batch of data by default, giving you a basic sense of the dataset's contents;
-
Click "Resample" to sample a new batch of data;
-
Click "View Details" to inspect the contents of a single record.
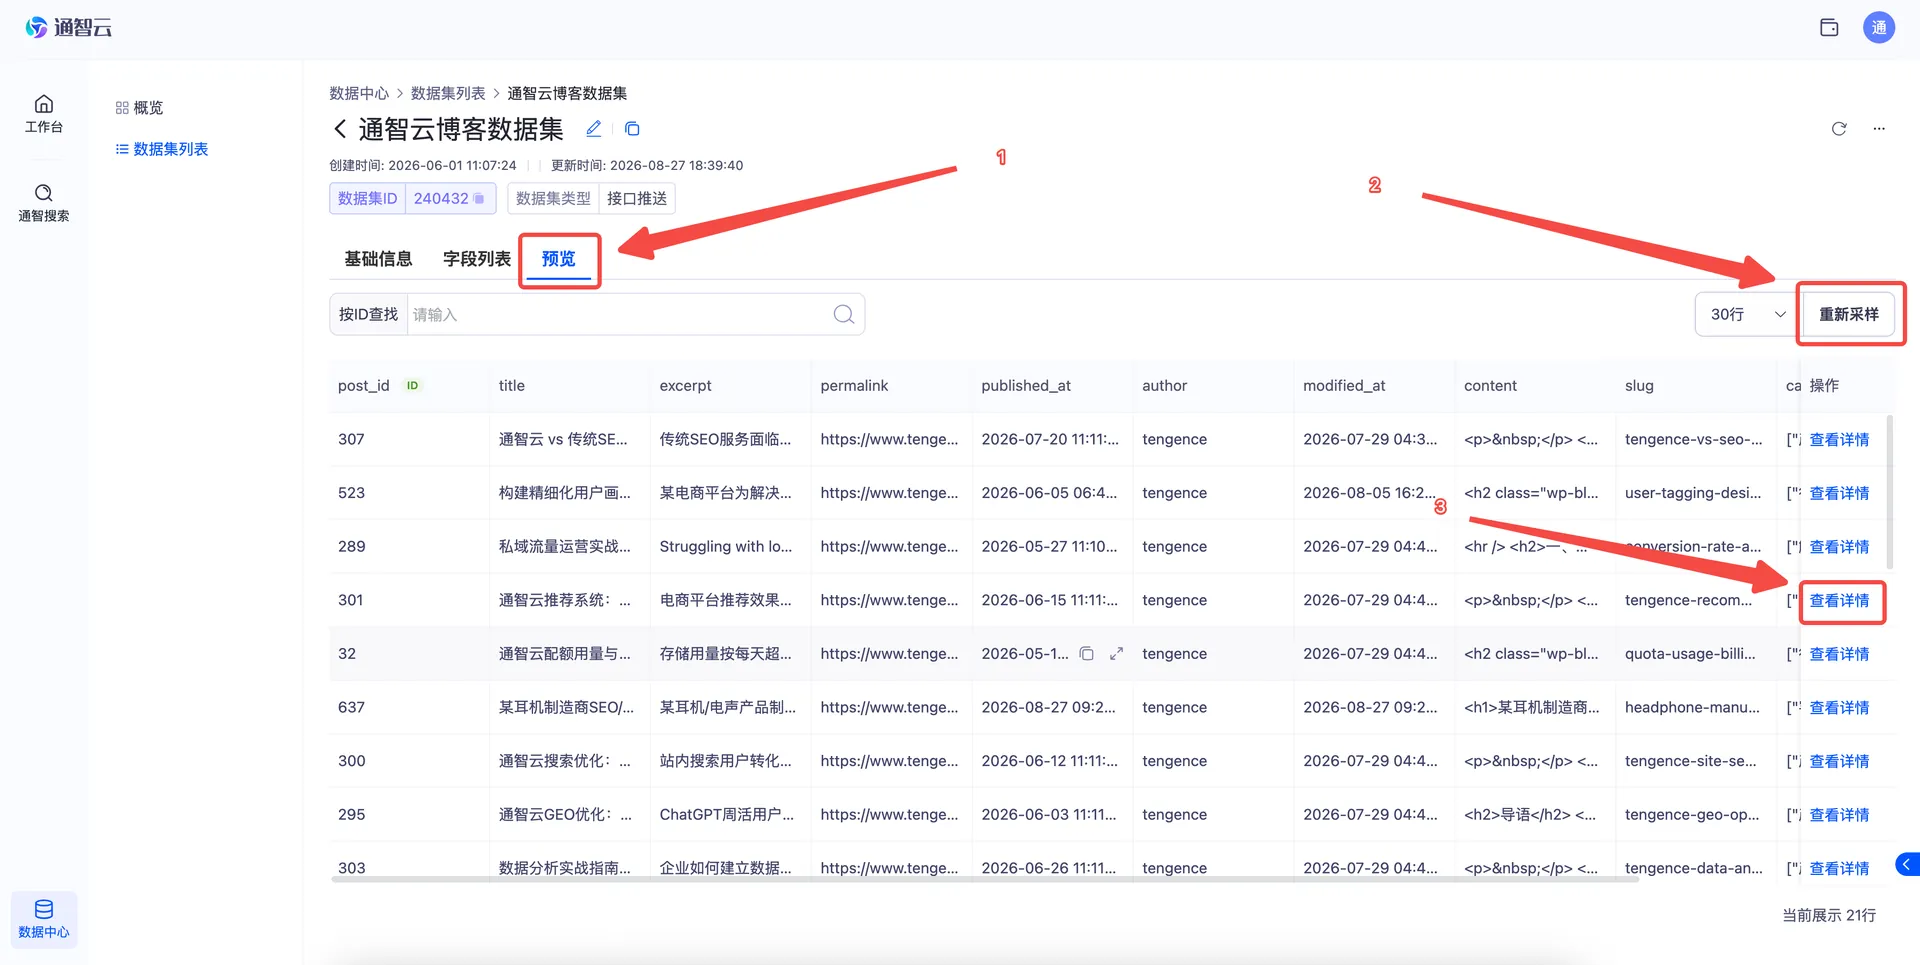
Figure 6-3 Sampled data viewing in the "Preview" area
Appendix: Glossary
| Term | Description |
|---|---|
| ID field | The field that uniquely identifies each record in a dataset; every dataset must have exactly one |
| Semantic tag | A tag describing a field's business meaning, helping the system better understand your business data |
| Full sync / incremental sync | Full sync copies all existing data at once and no incremental data afterwards; incremental sync only syncs new or changed data, either on a scheduled interval (scheduled incremental) or via binlog (real-time incremental) |
| binlog | The binary log of MySQL, which records data changes; real-time incremental sync is based on the binlog and does not depend on a time field |